
Prerequisites
- nodejs
- npm
- VS Code (or some other code IDE)
- AWS Account
- Route 53 Domain Name (optional)
Fork the Blog Code
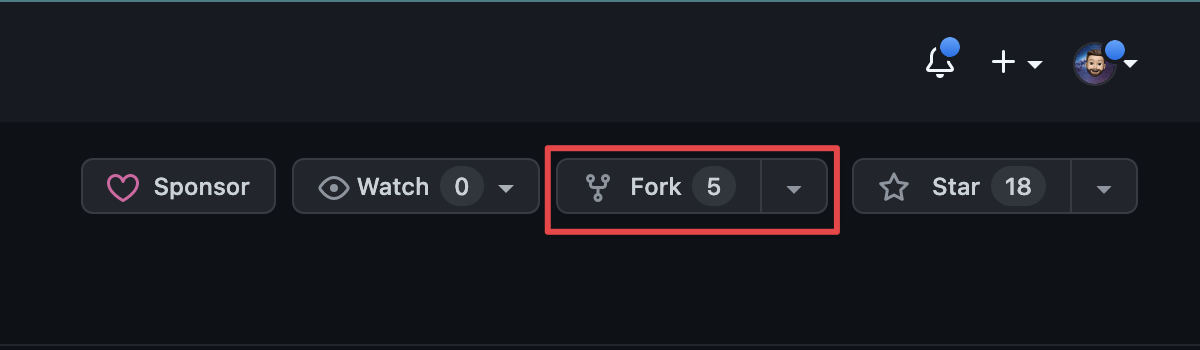
Log in to GitHub then navigate to the GitHub Repository and click “fork”.
Clone your fork to your local machine so you can edit it later.
You should be logged into GitHub at this point in your web browser.
Deploy to AWS Amplify
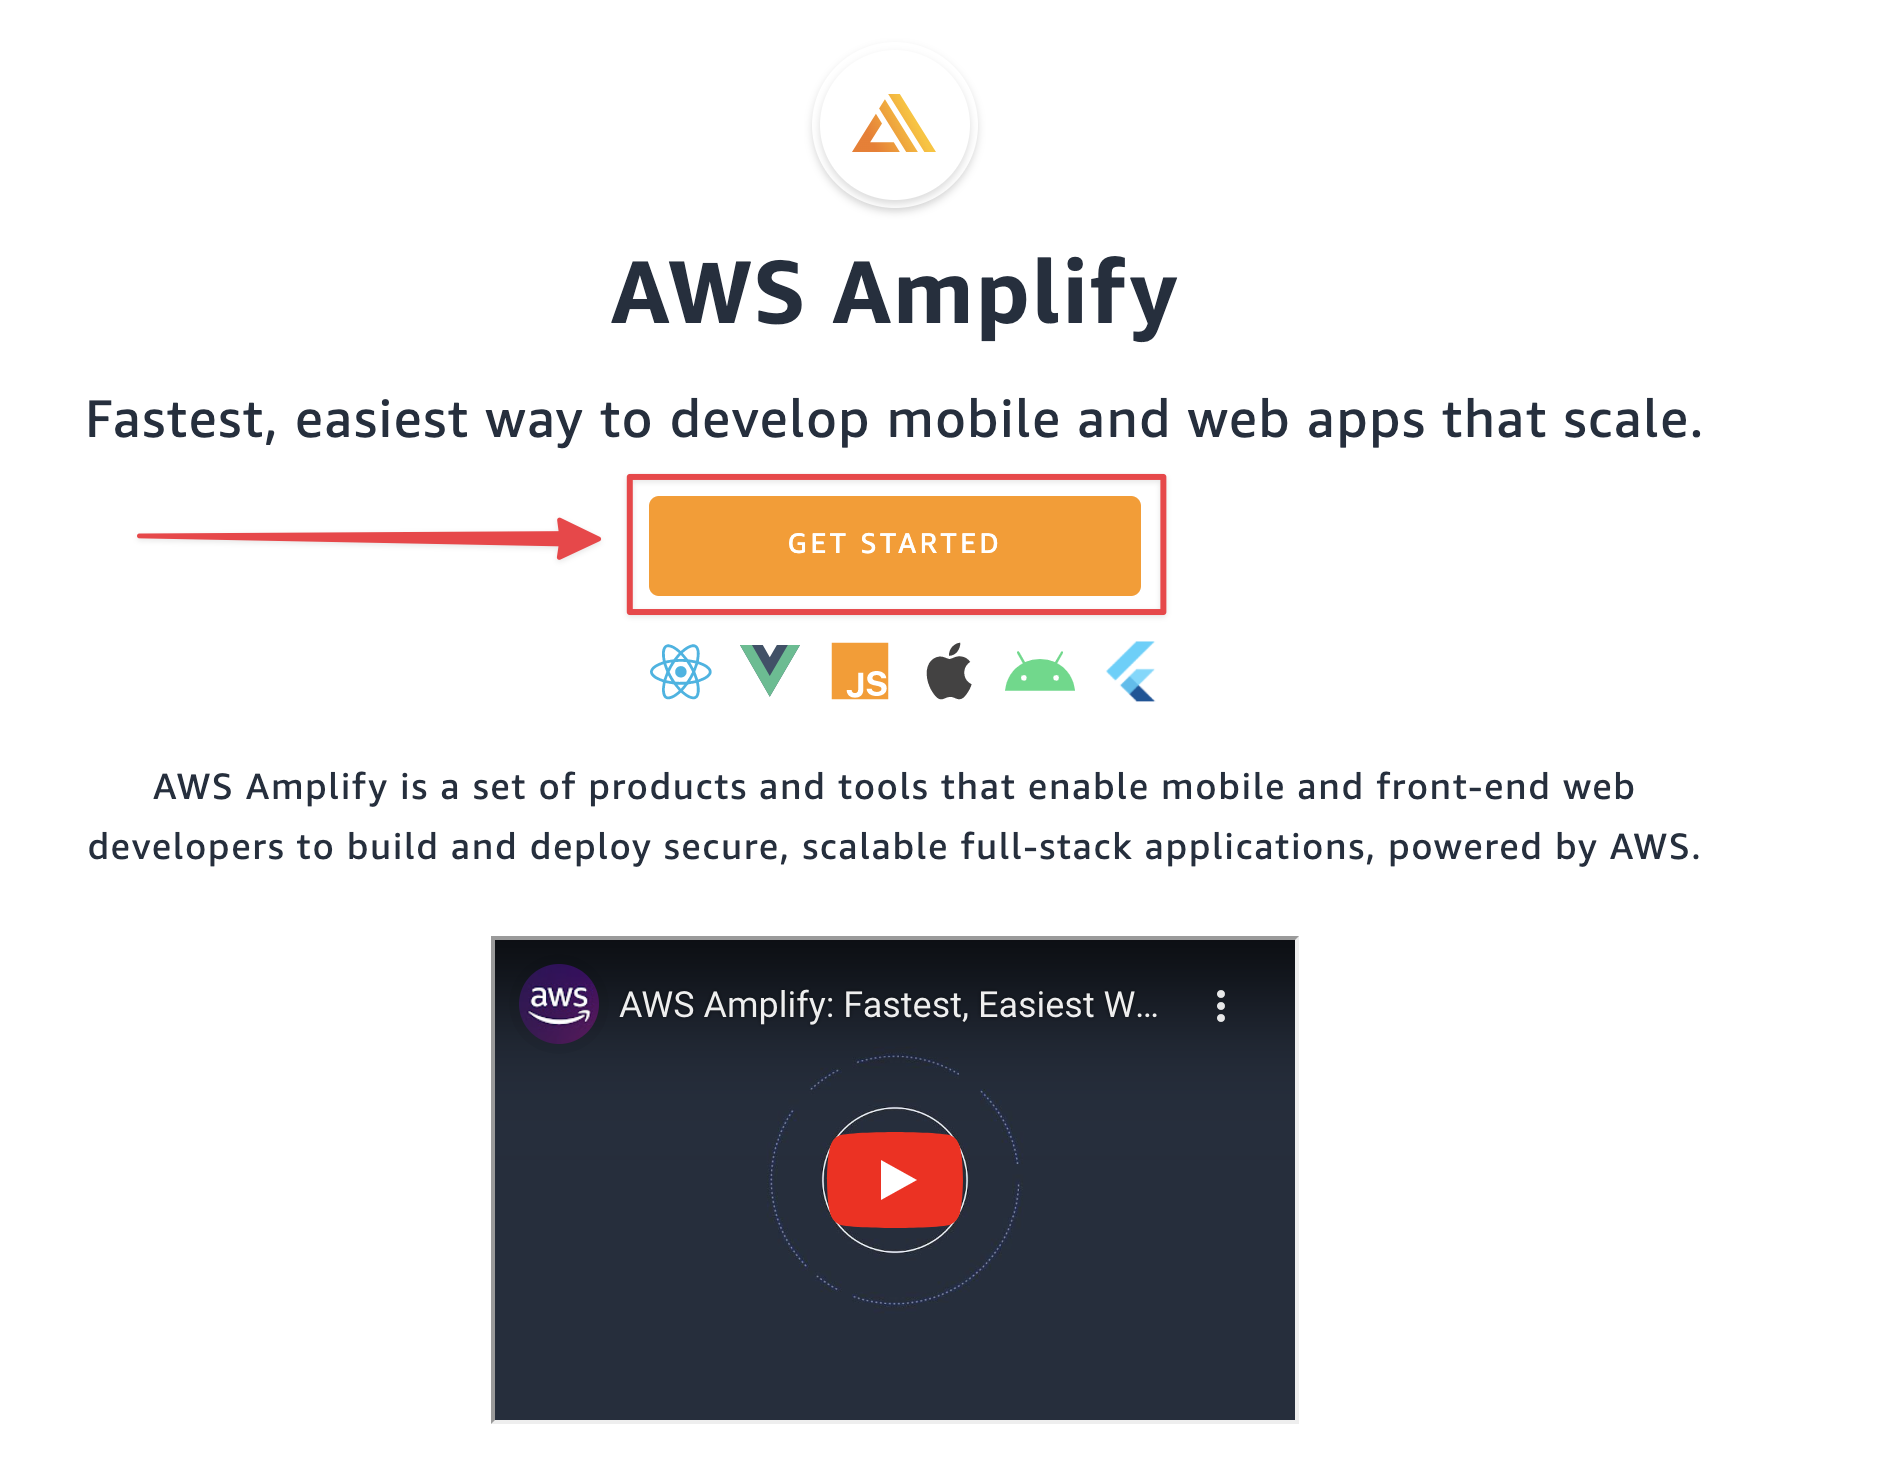
Navigate to AWS Amplify and click “Get Started”.
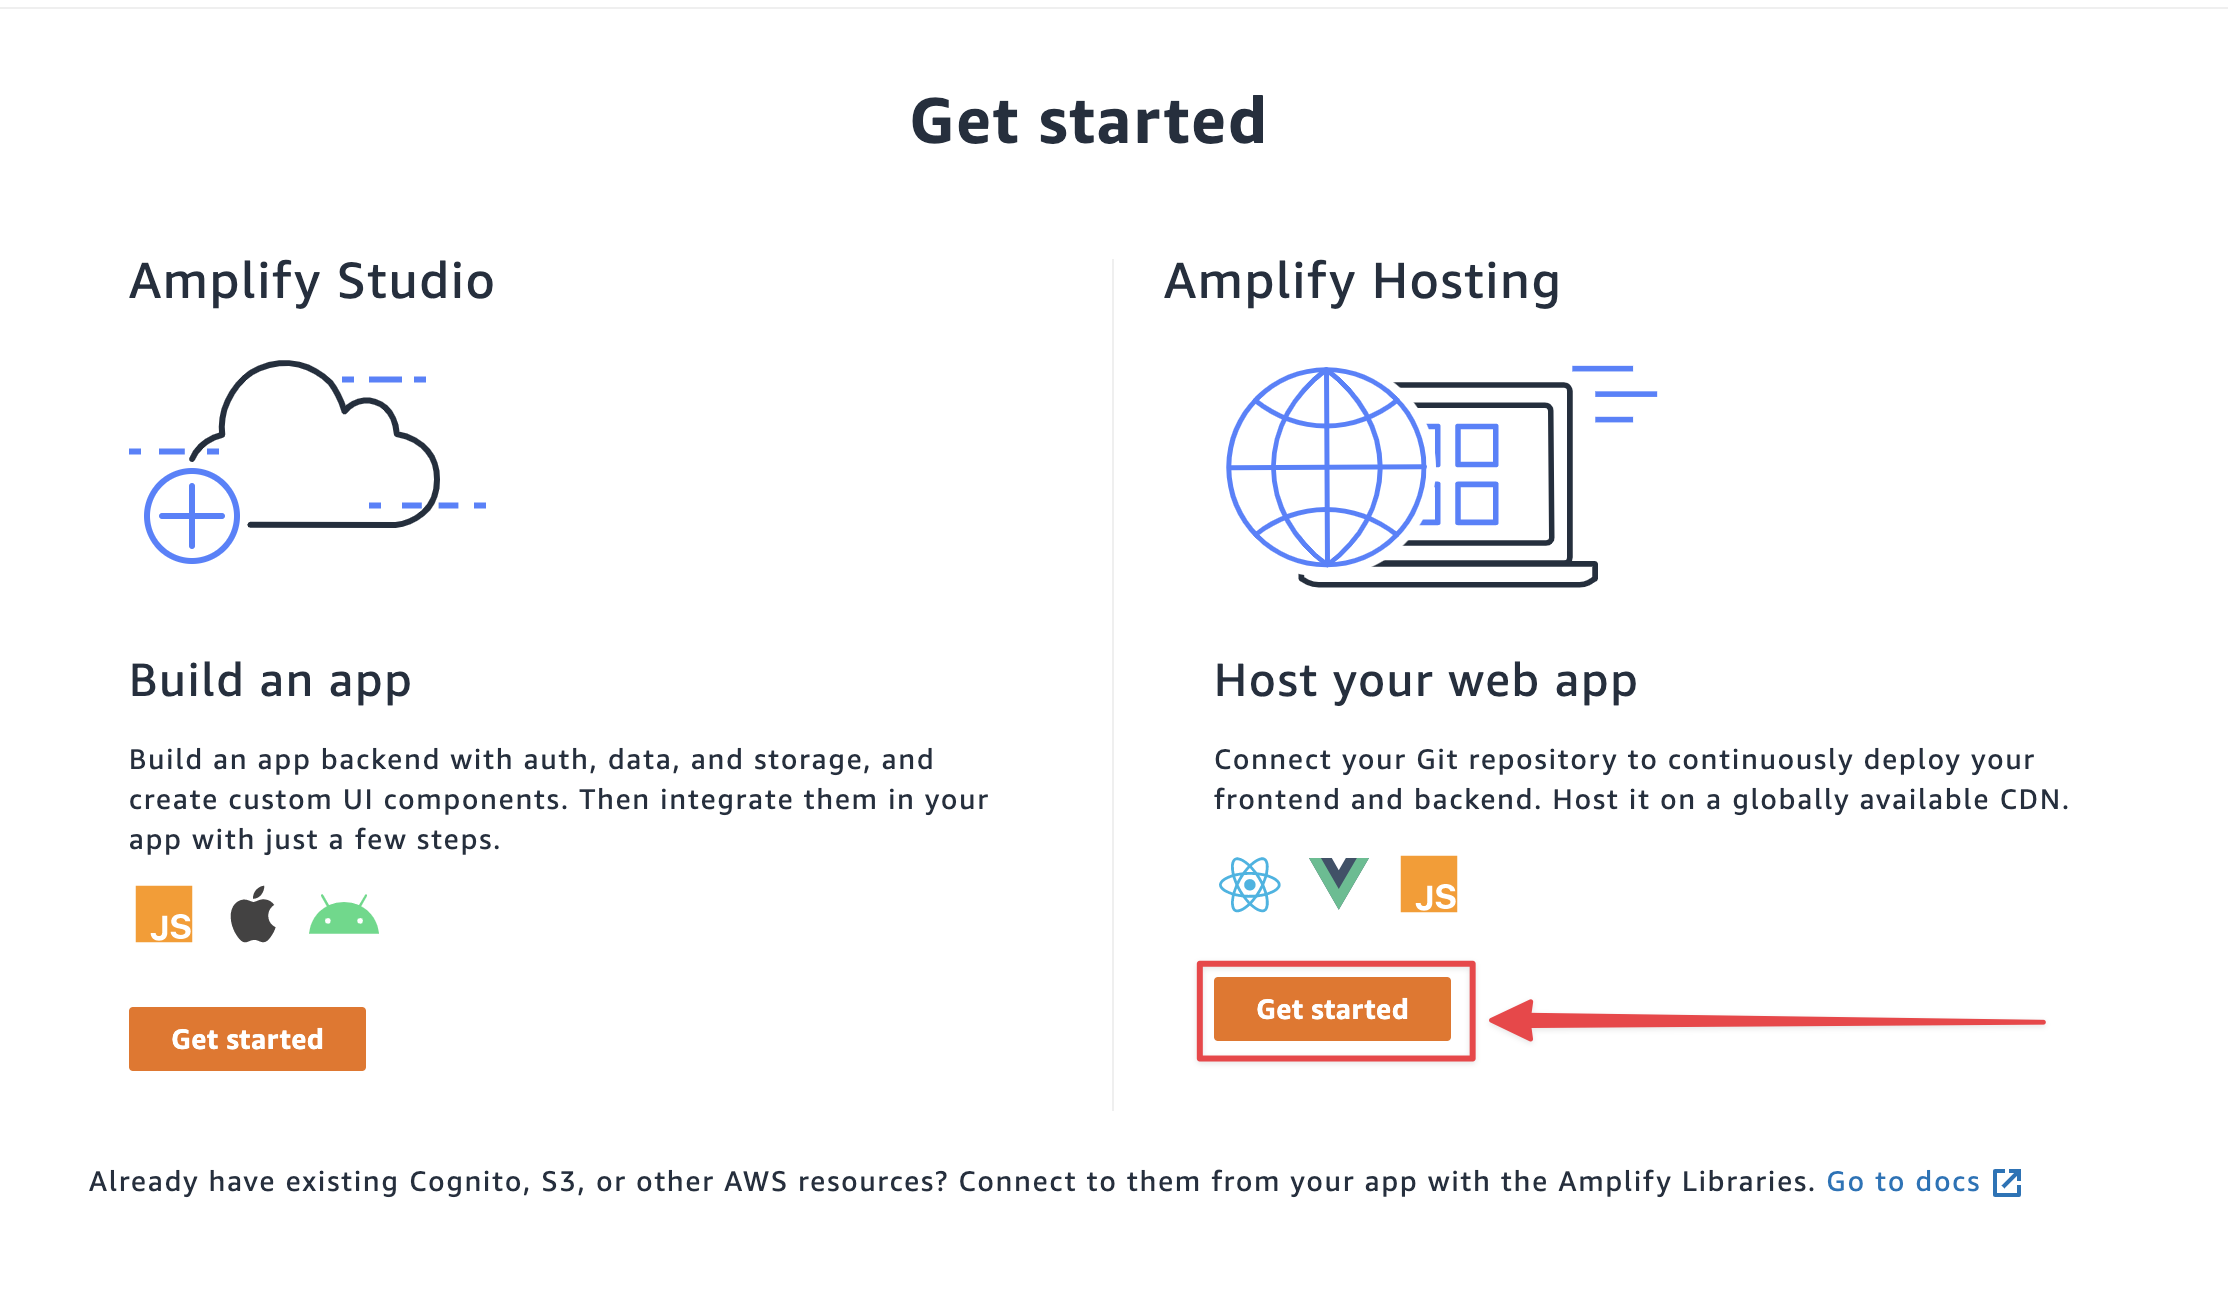
The page should scroll down and then click on the “Get started” button under Amplify Hosting - Host your web app shown below.
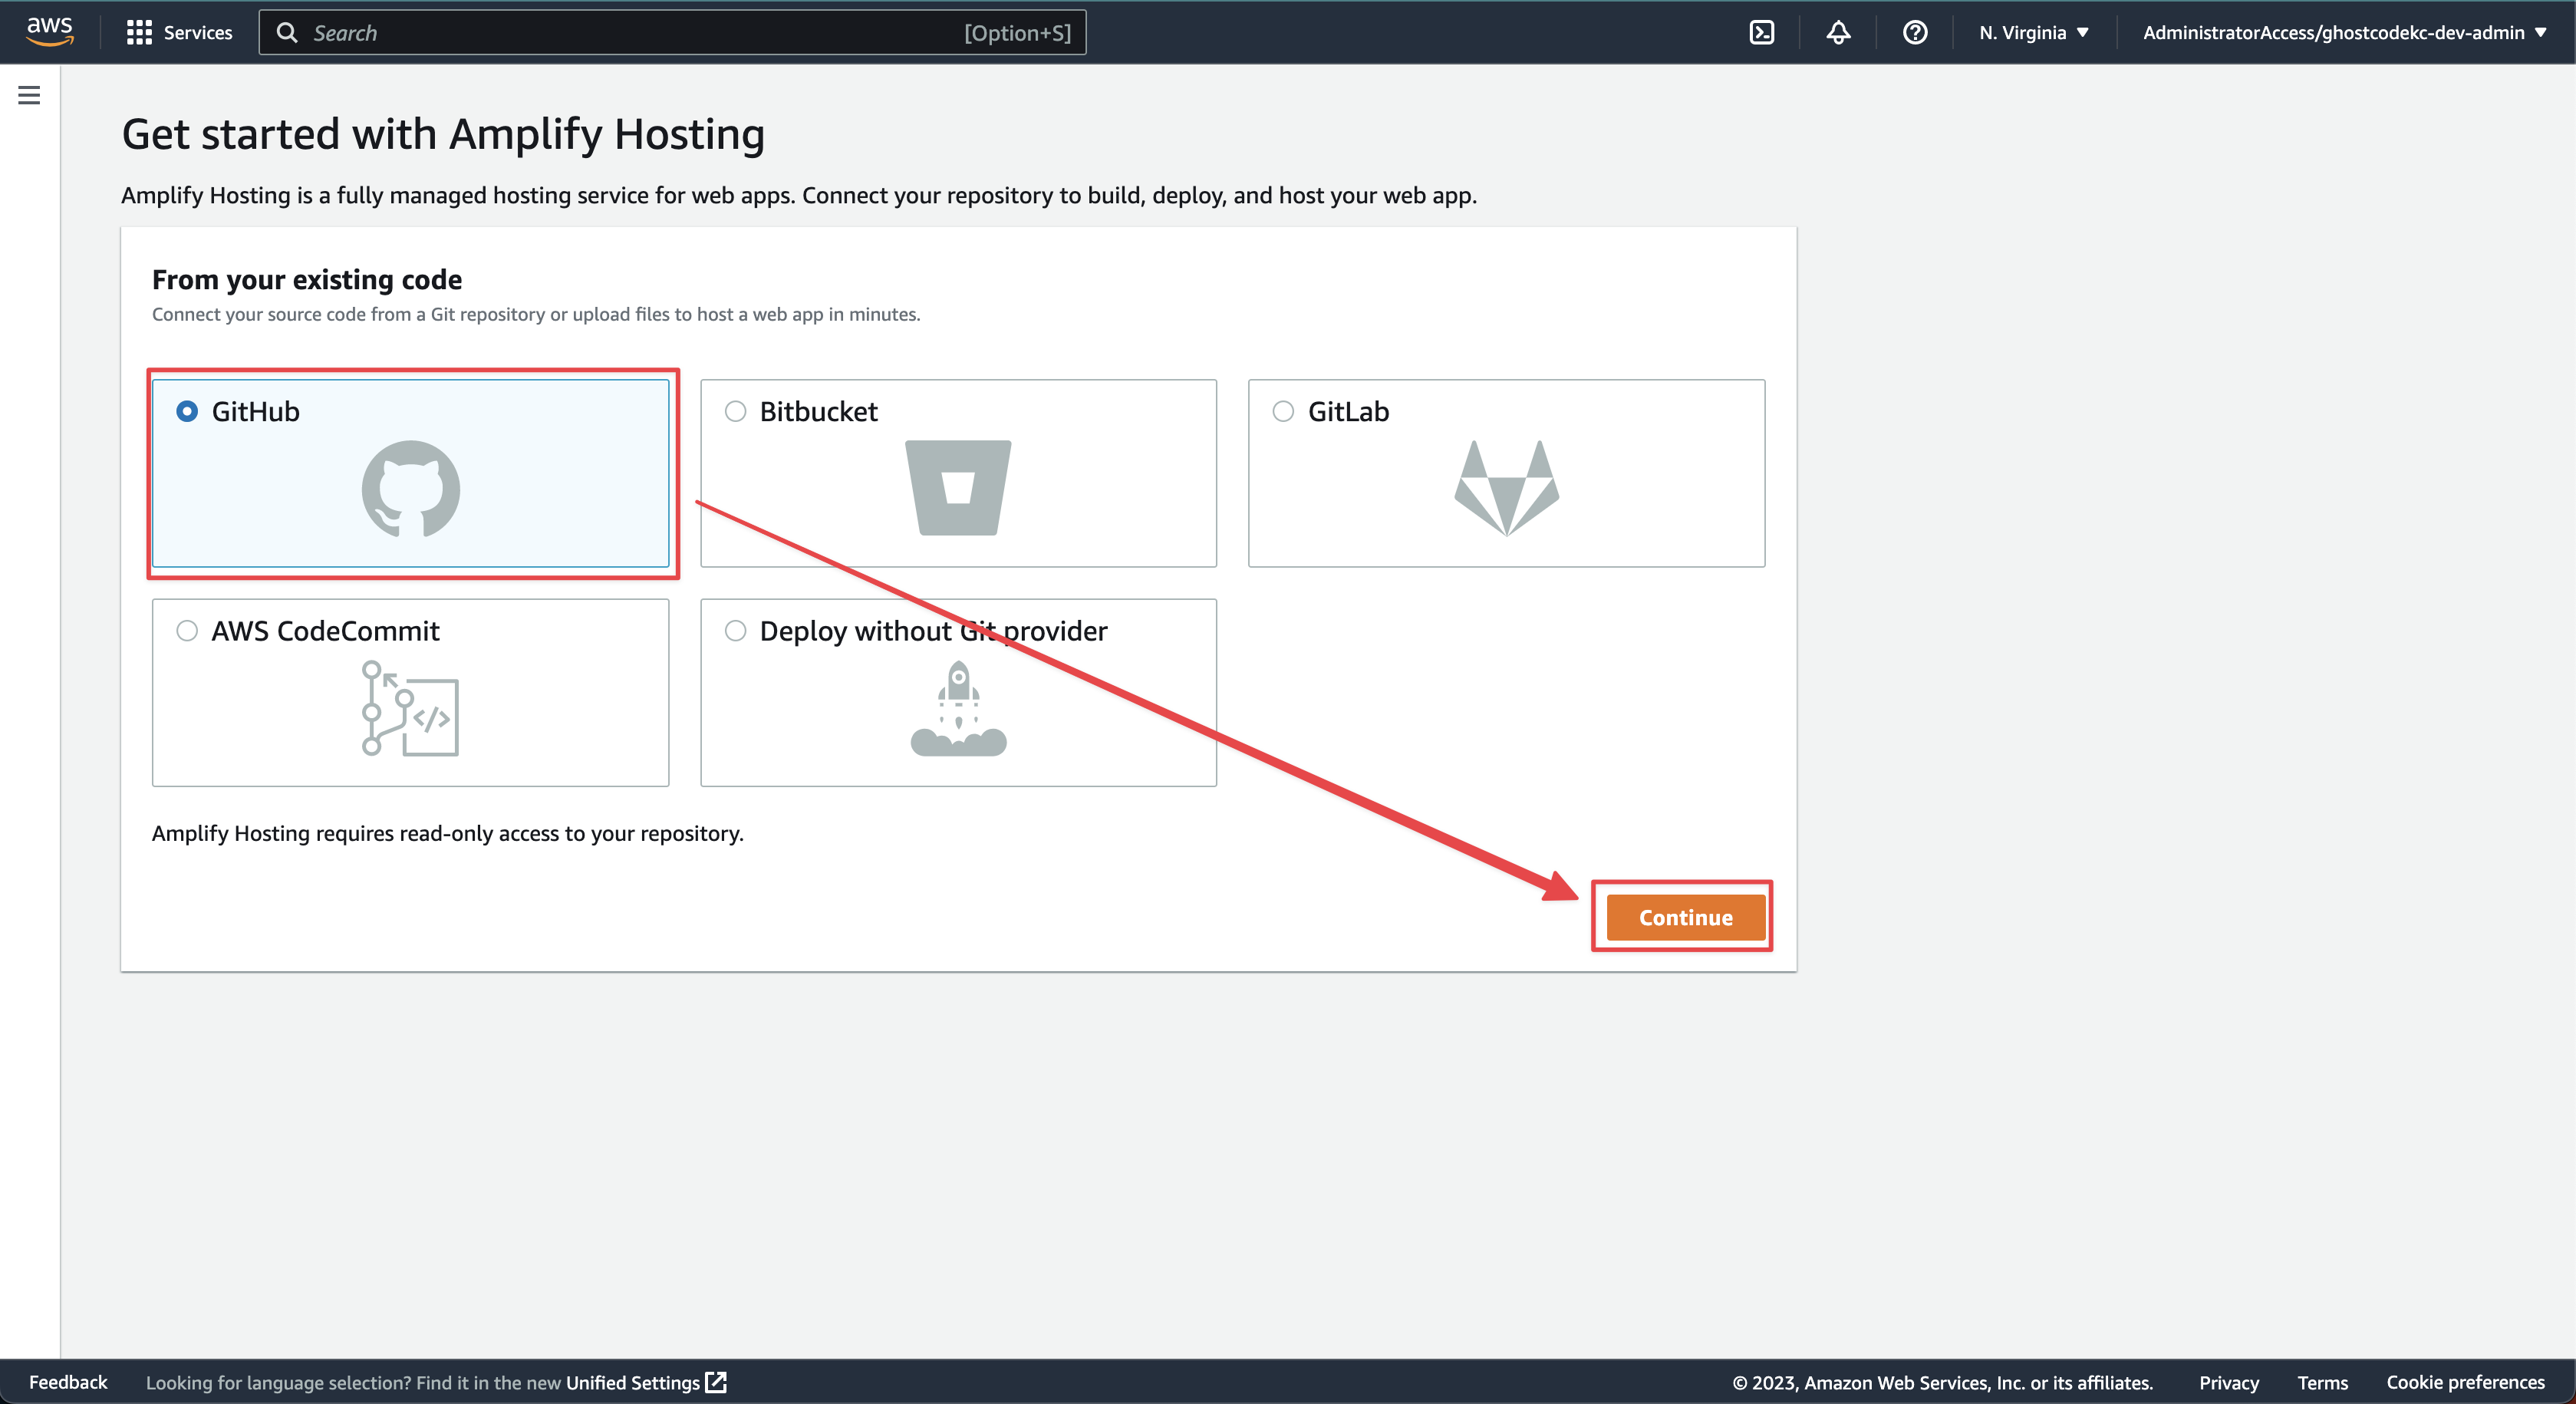
You will then be prompted with a selection of code repositories to choose from. In this guide we will select “GitHub” then click “Continue”.
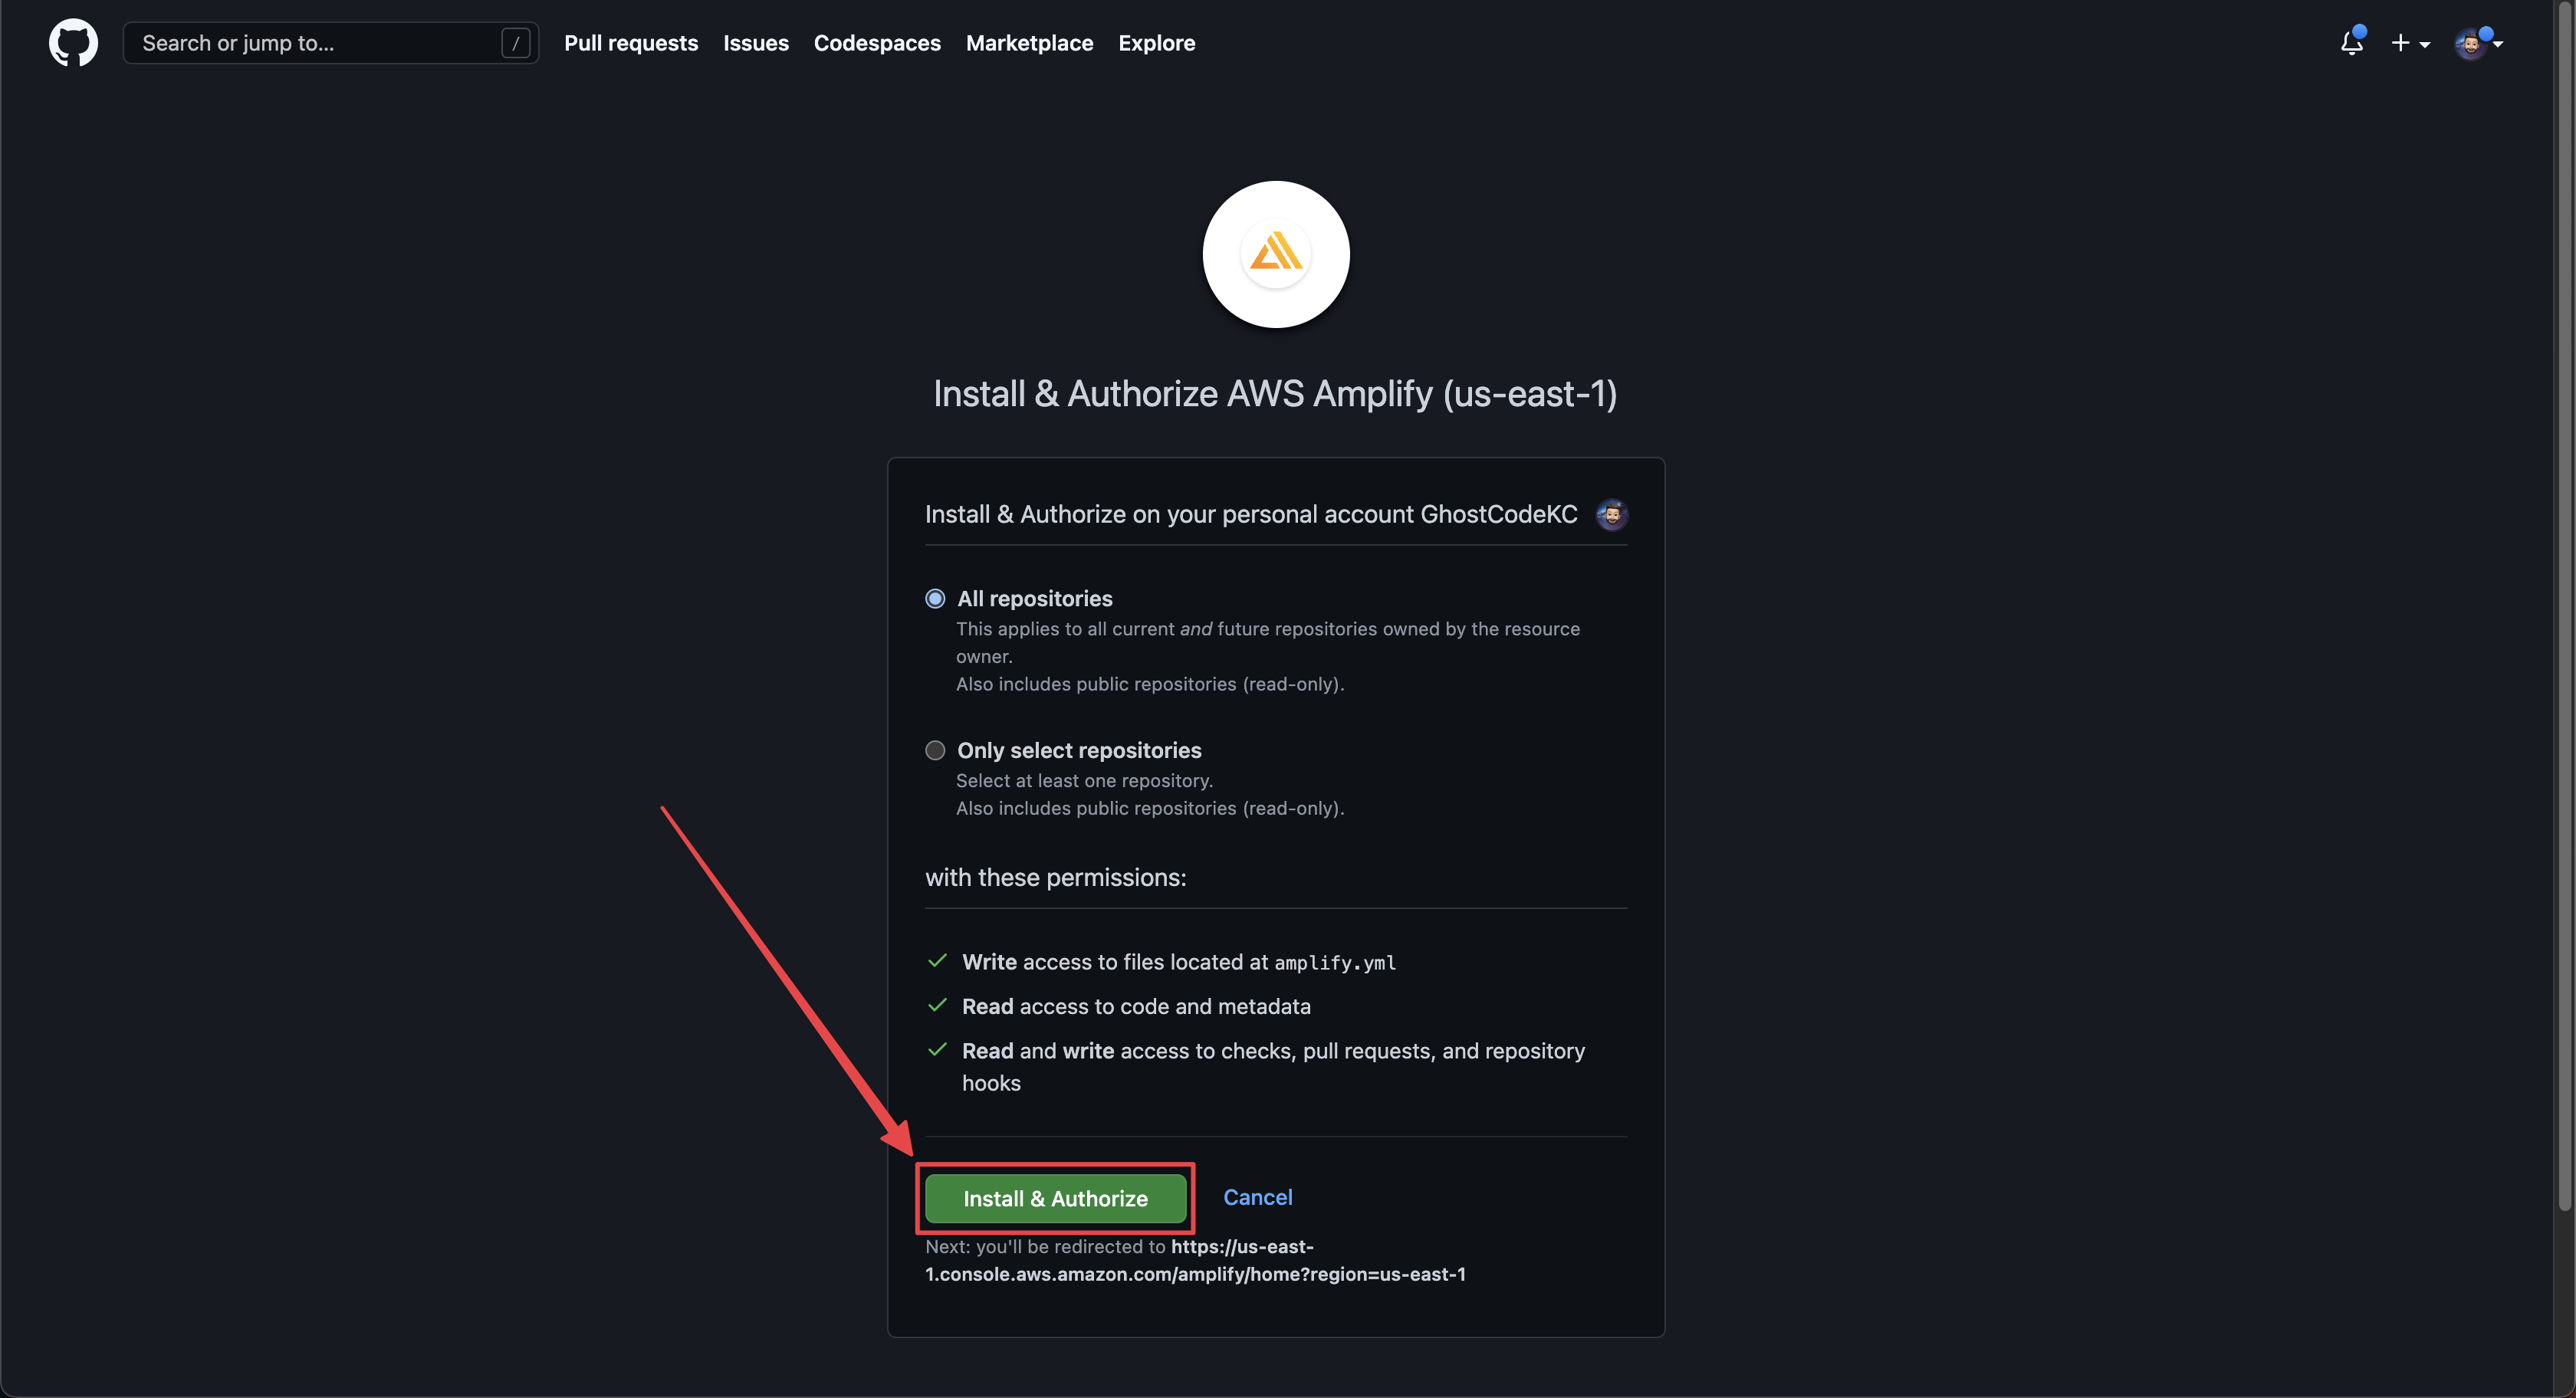
You will now be redirected to GitHub to install and authorize the AWS Amplify GitHub Application. After ensuring that “All repositories” is selected, click the “Install & Authorize” button.
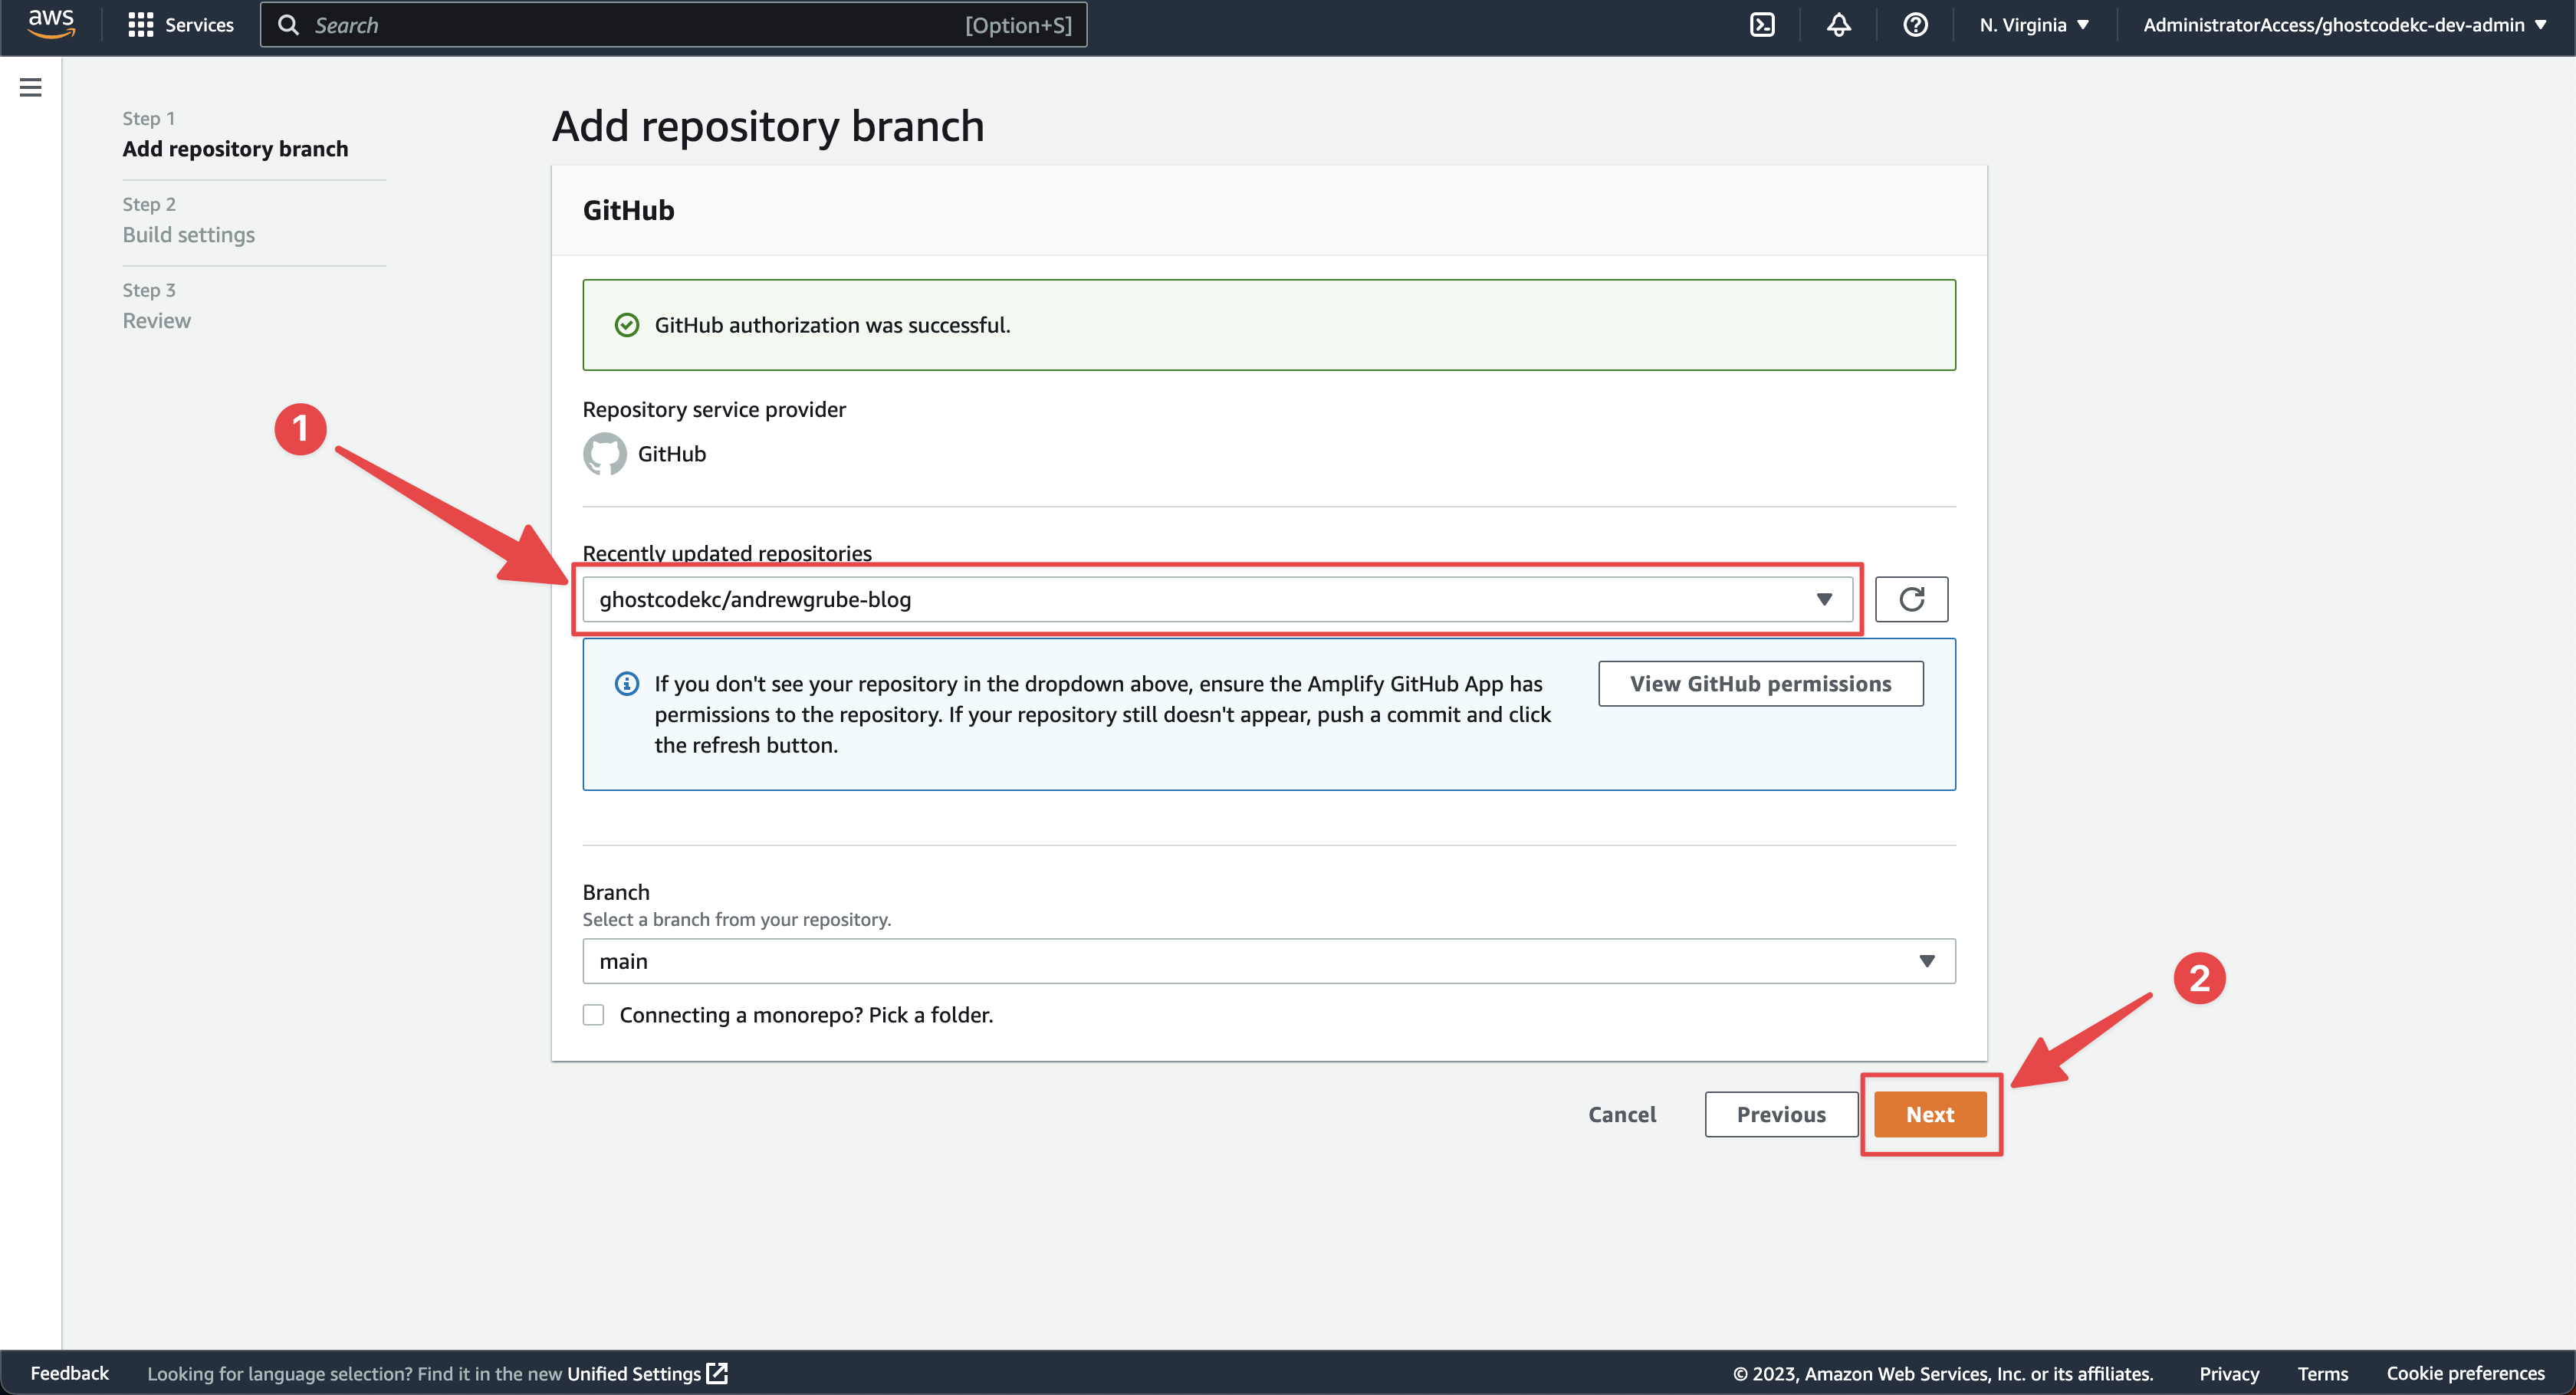
Select your GitHub forked repository from the dropdown list and click “Next”.
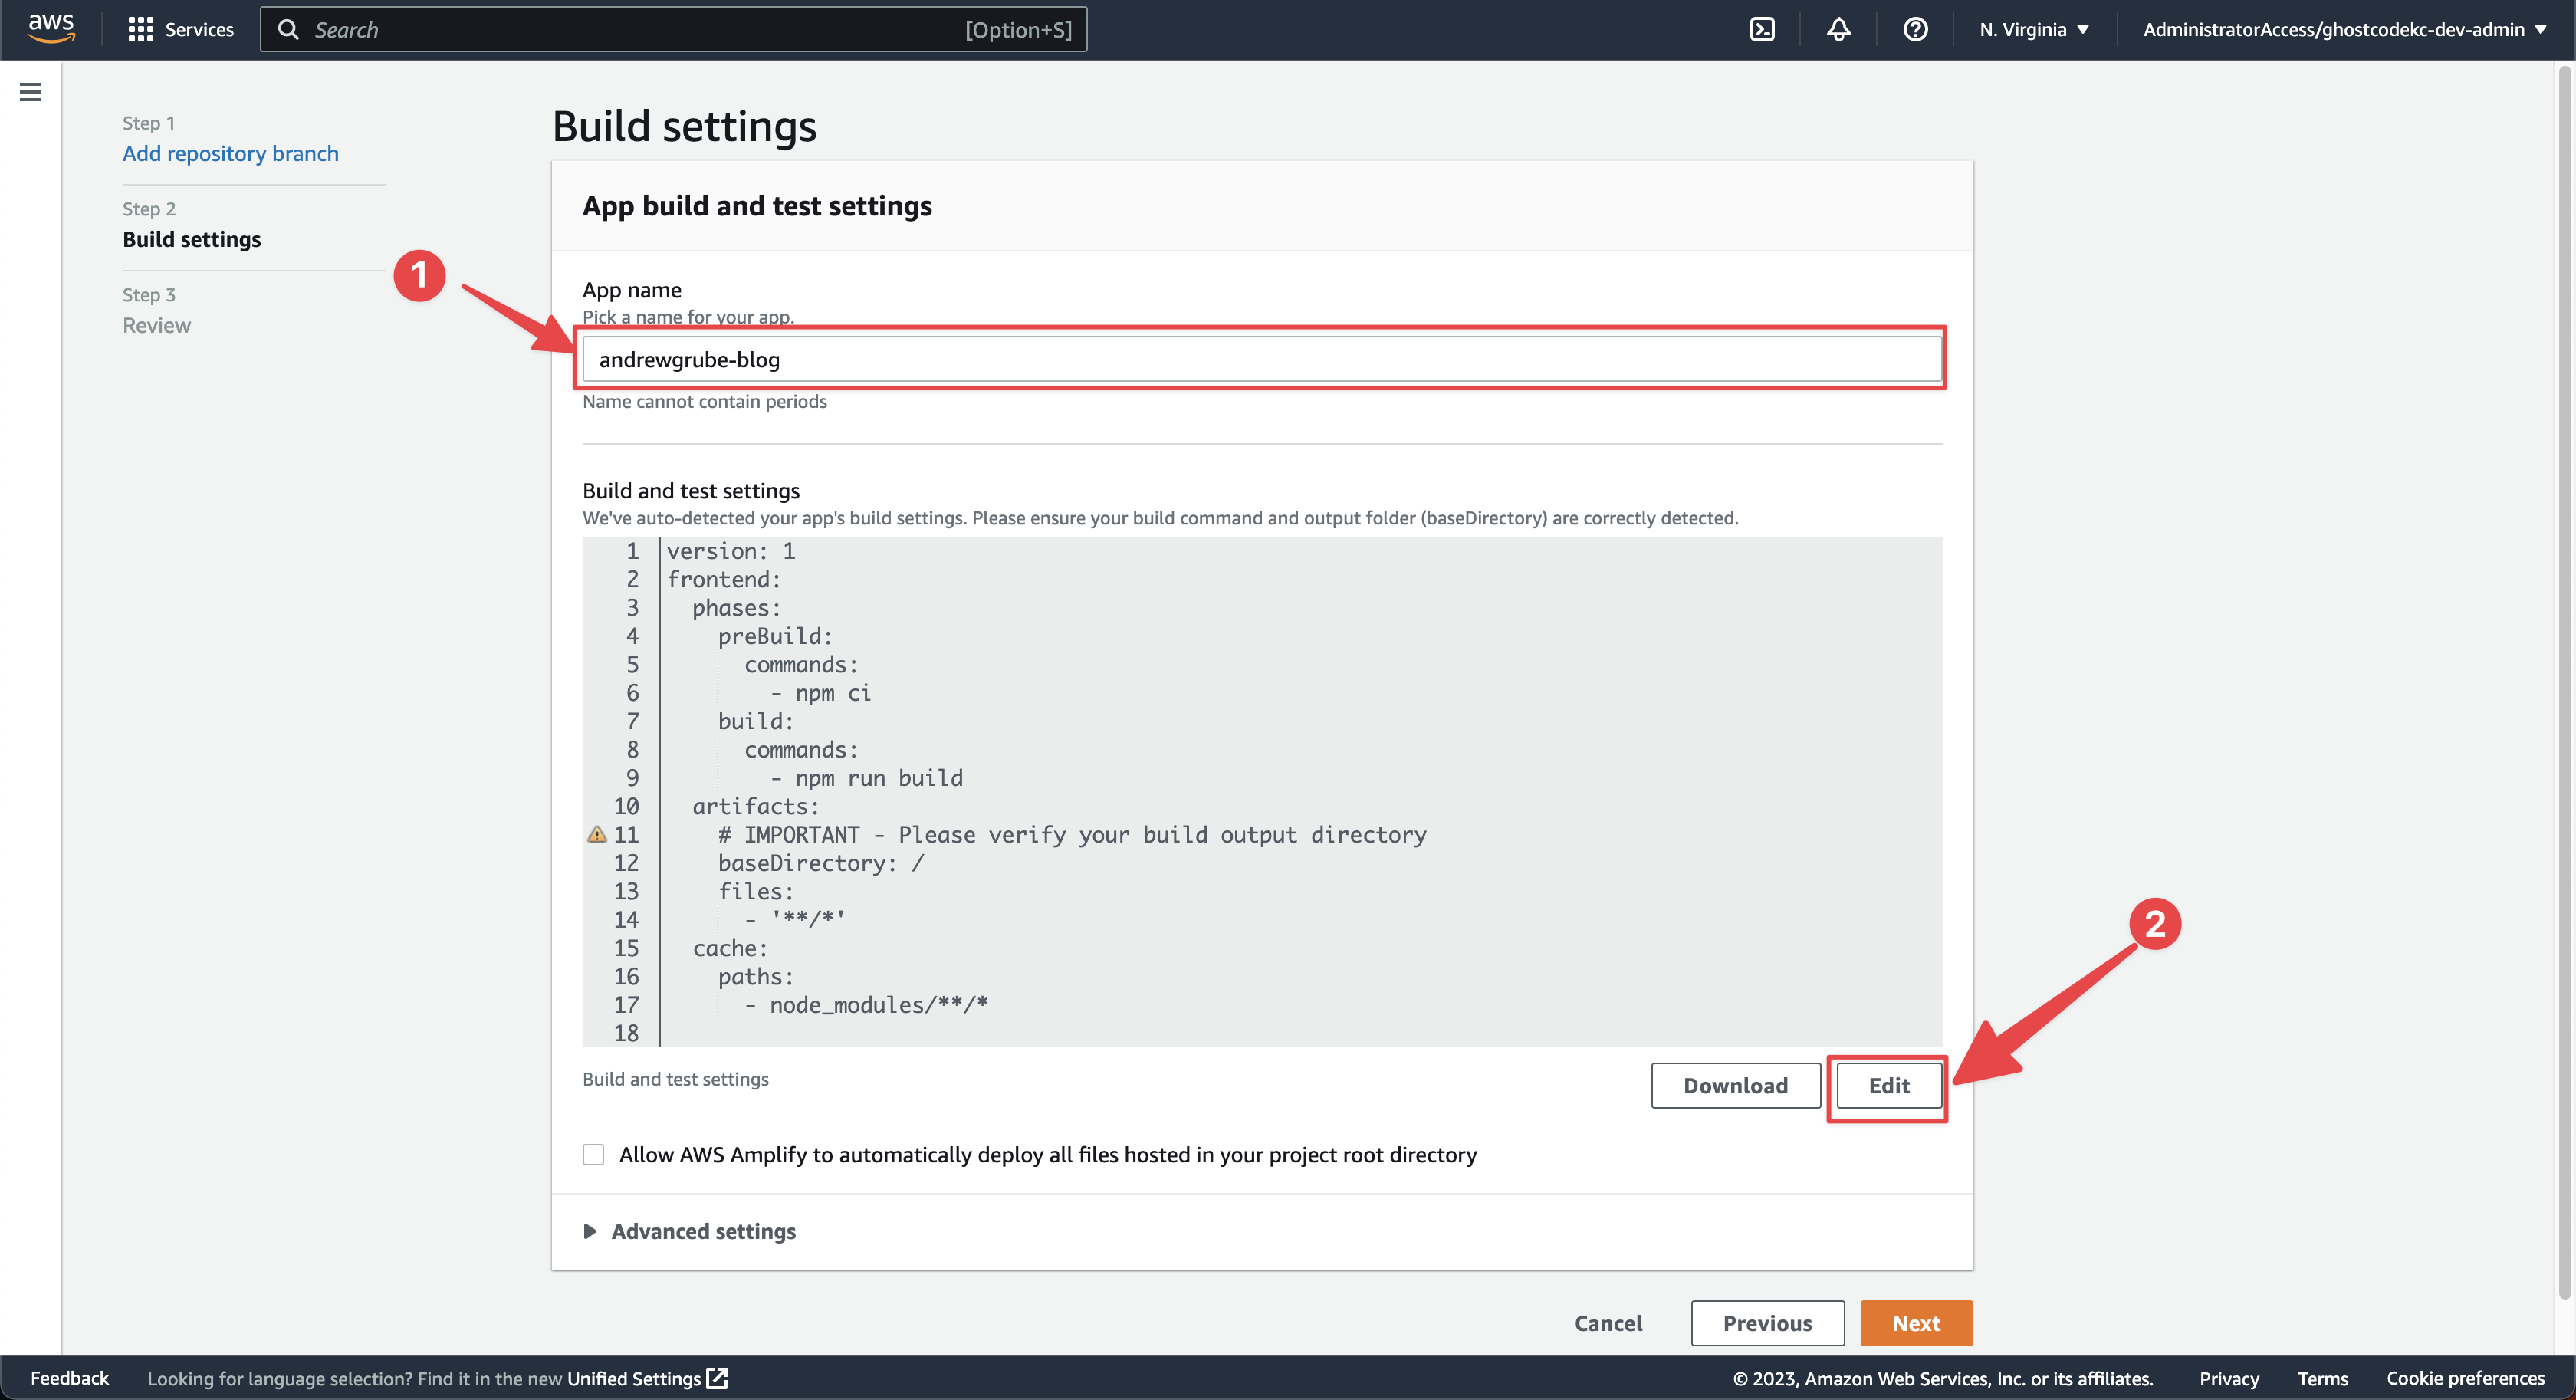
Choose your app name for this AWS Amplify application. I decided to name mine andrewgrube-blog for easy identification. Under the “Build and test settings” section you will need to click “Edit”.
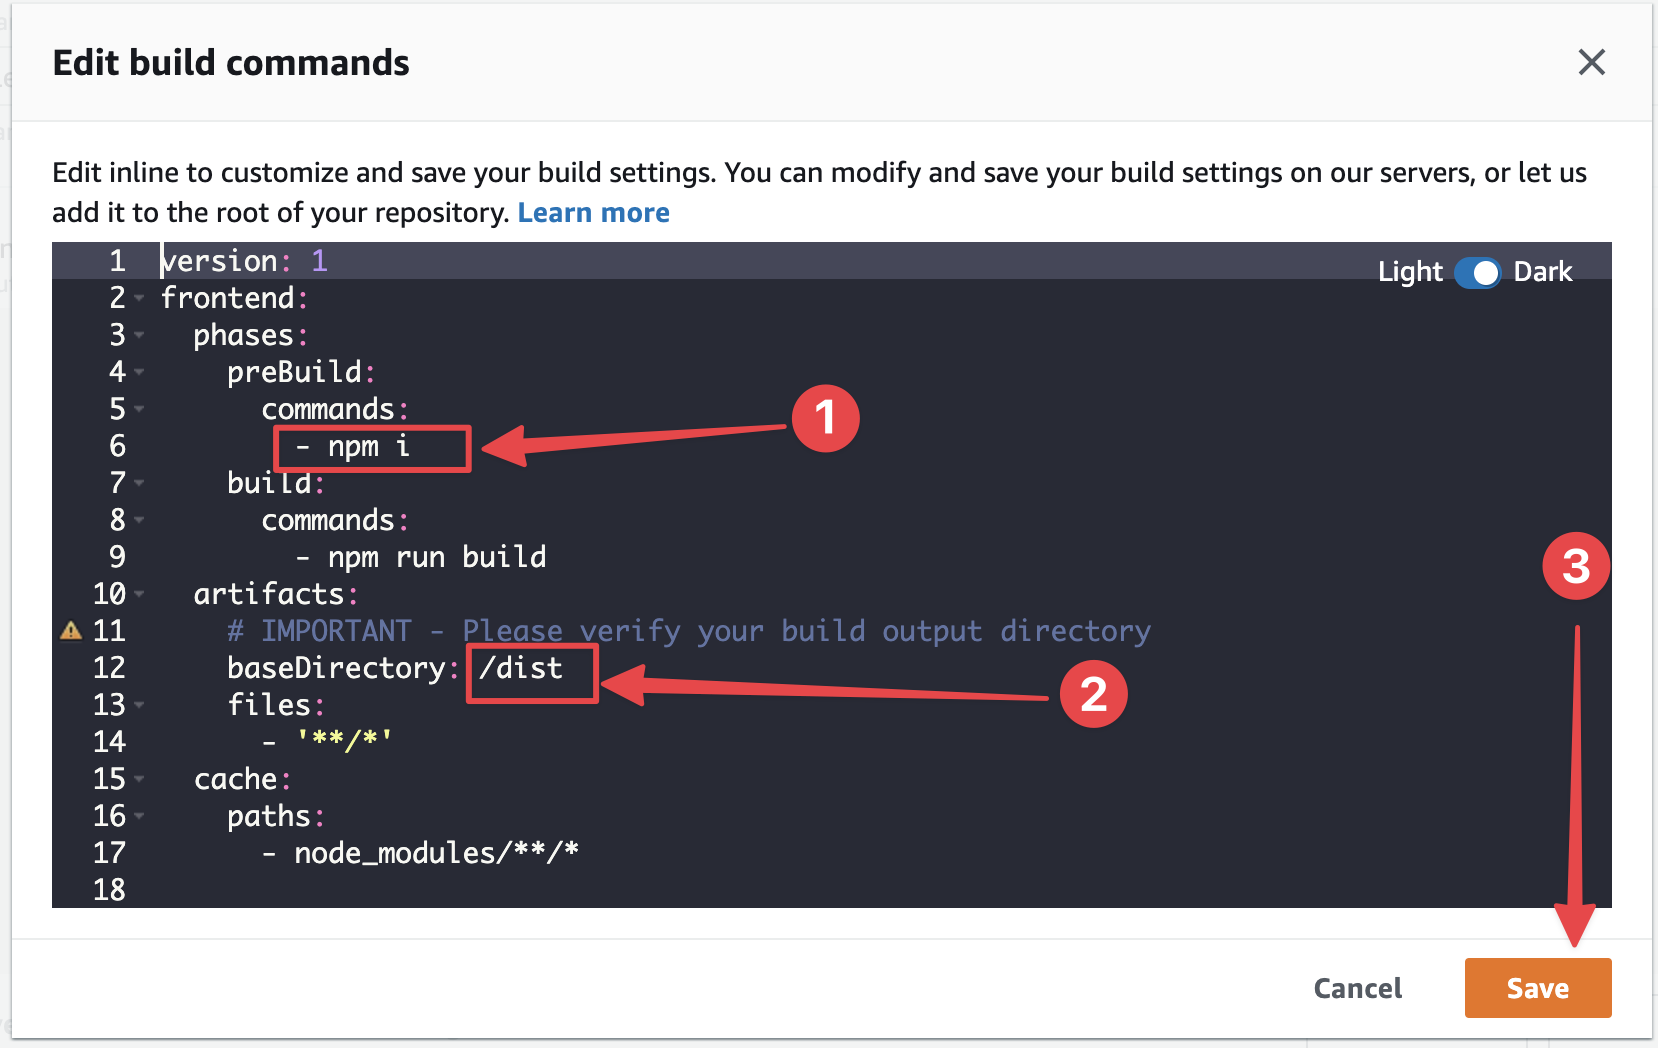
A screen titled “Edit build commands” will pop up. You will need to make sure that you change line 6 and line 12 as shown below.
Line 6: - npm ci
Line 12: /dist
After the changes have been made, click “Save”.
At this point you will be brought back to the “App build and test settings” page. Make sure that the “Allow AWS Amplify to automatically deploy all files hosted in your project root directory.” is checked and then click “Next”.
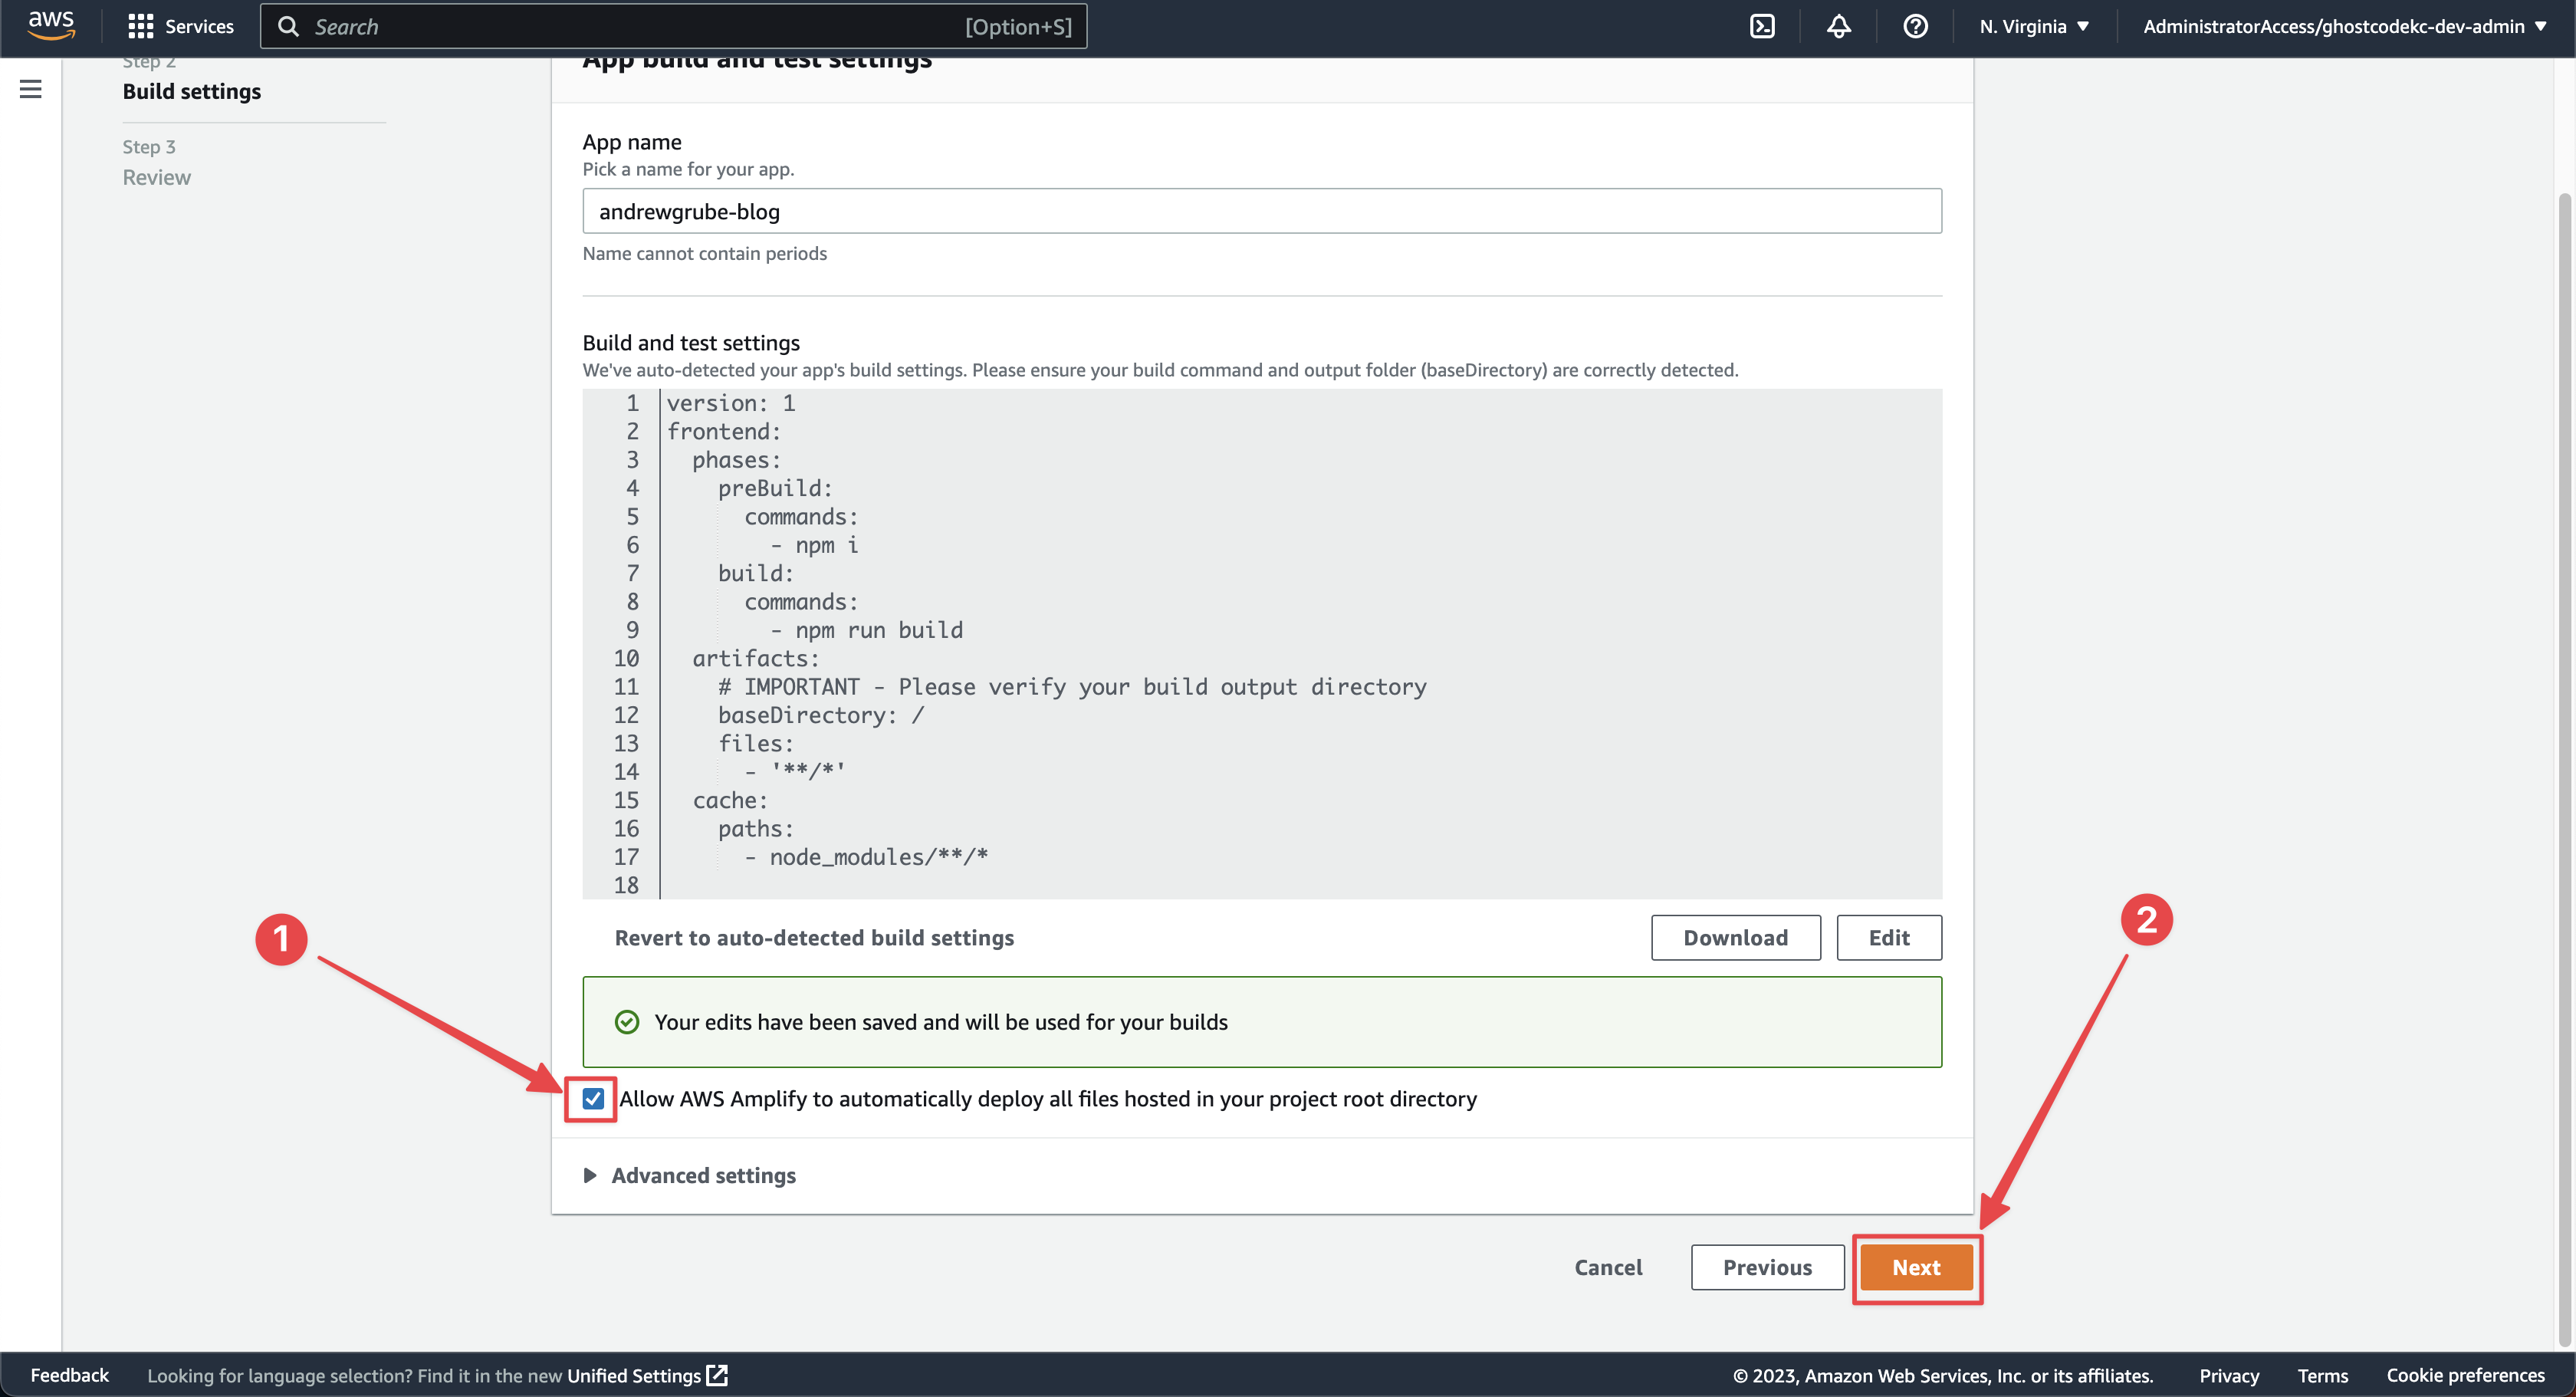
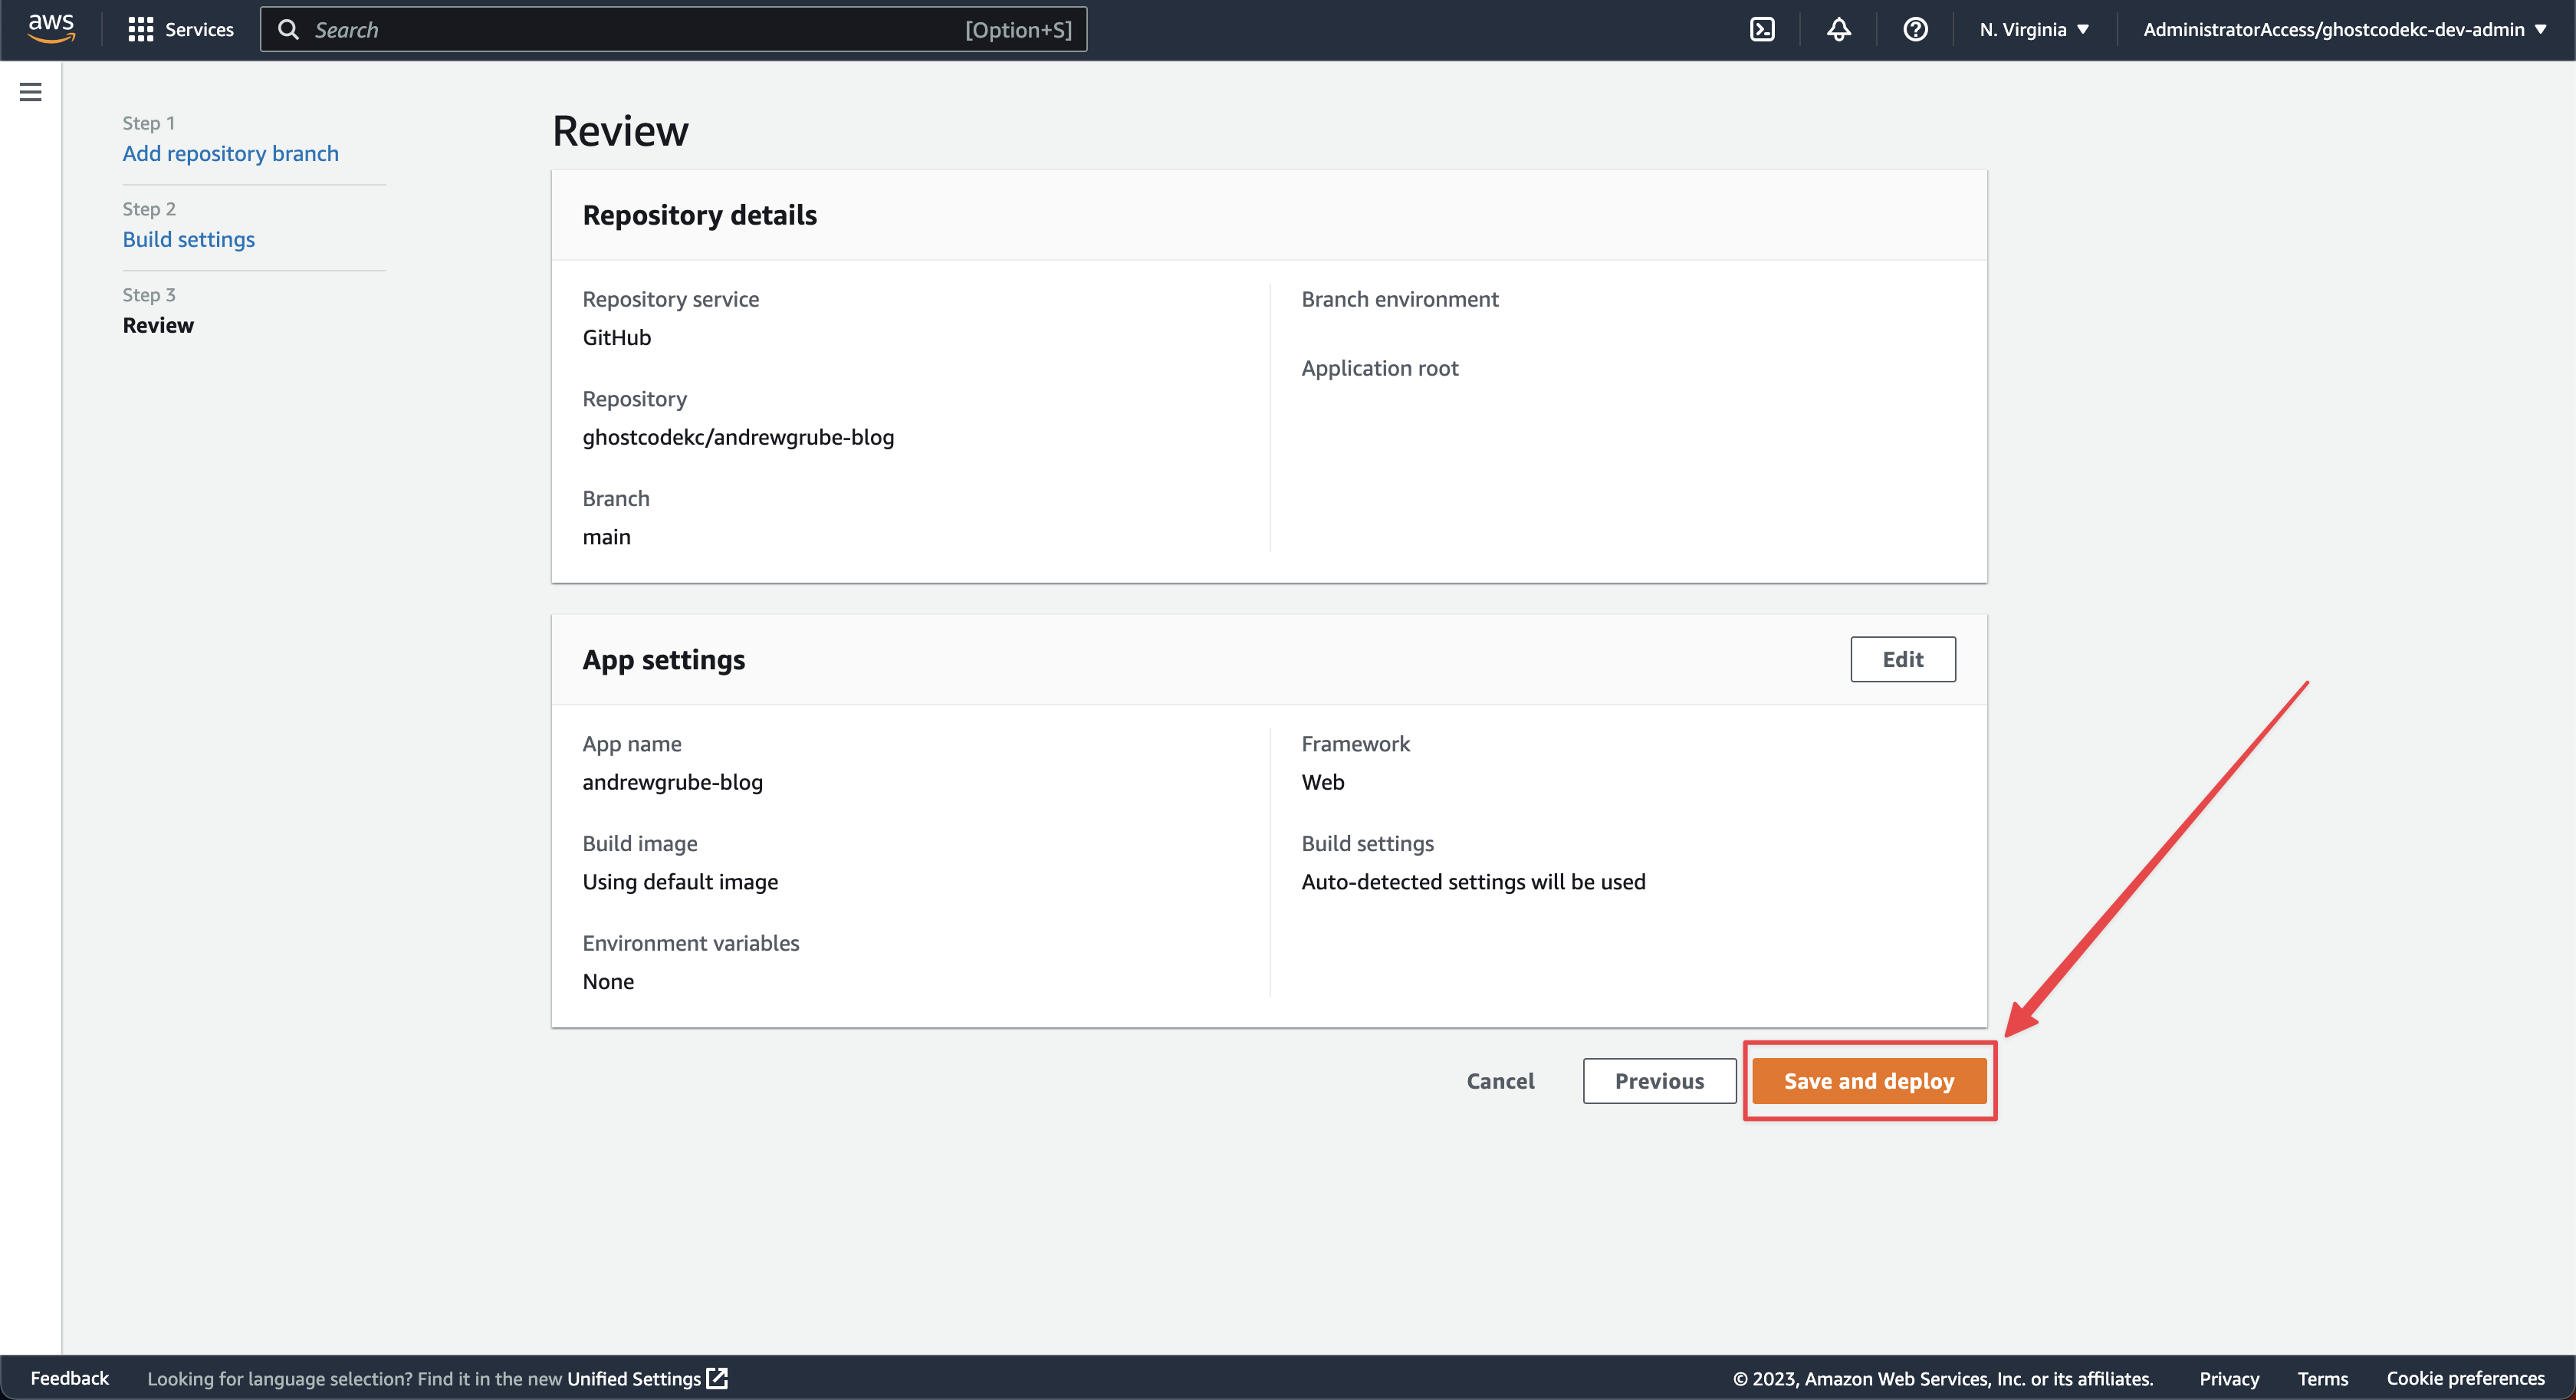
Double check that all of your settings are correct and then click the “Save and deploy” button.
The initial deployment typically takes between 10-15 minutes to complete. Once the deployment has completed (there will be a green chcekmark ✅ on the “deploy” step shown below) you can click the https://main...amplifyapp.com link to see your blog!
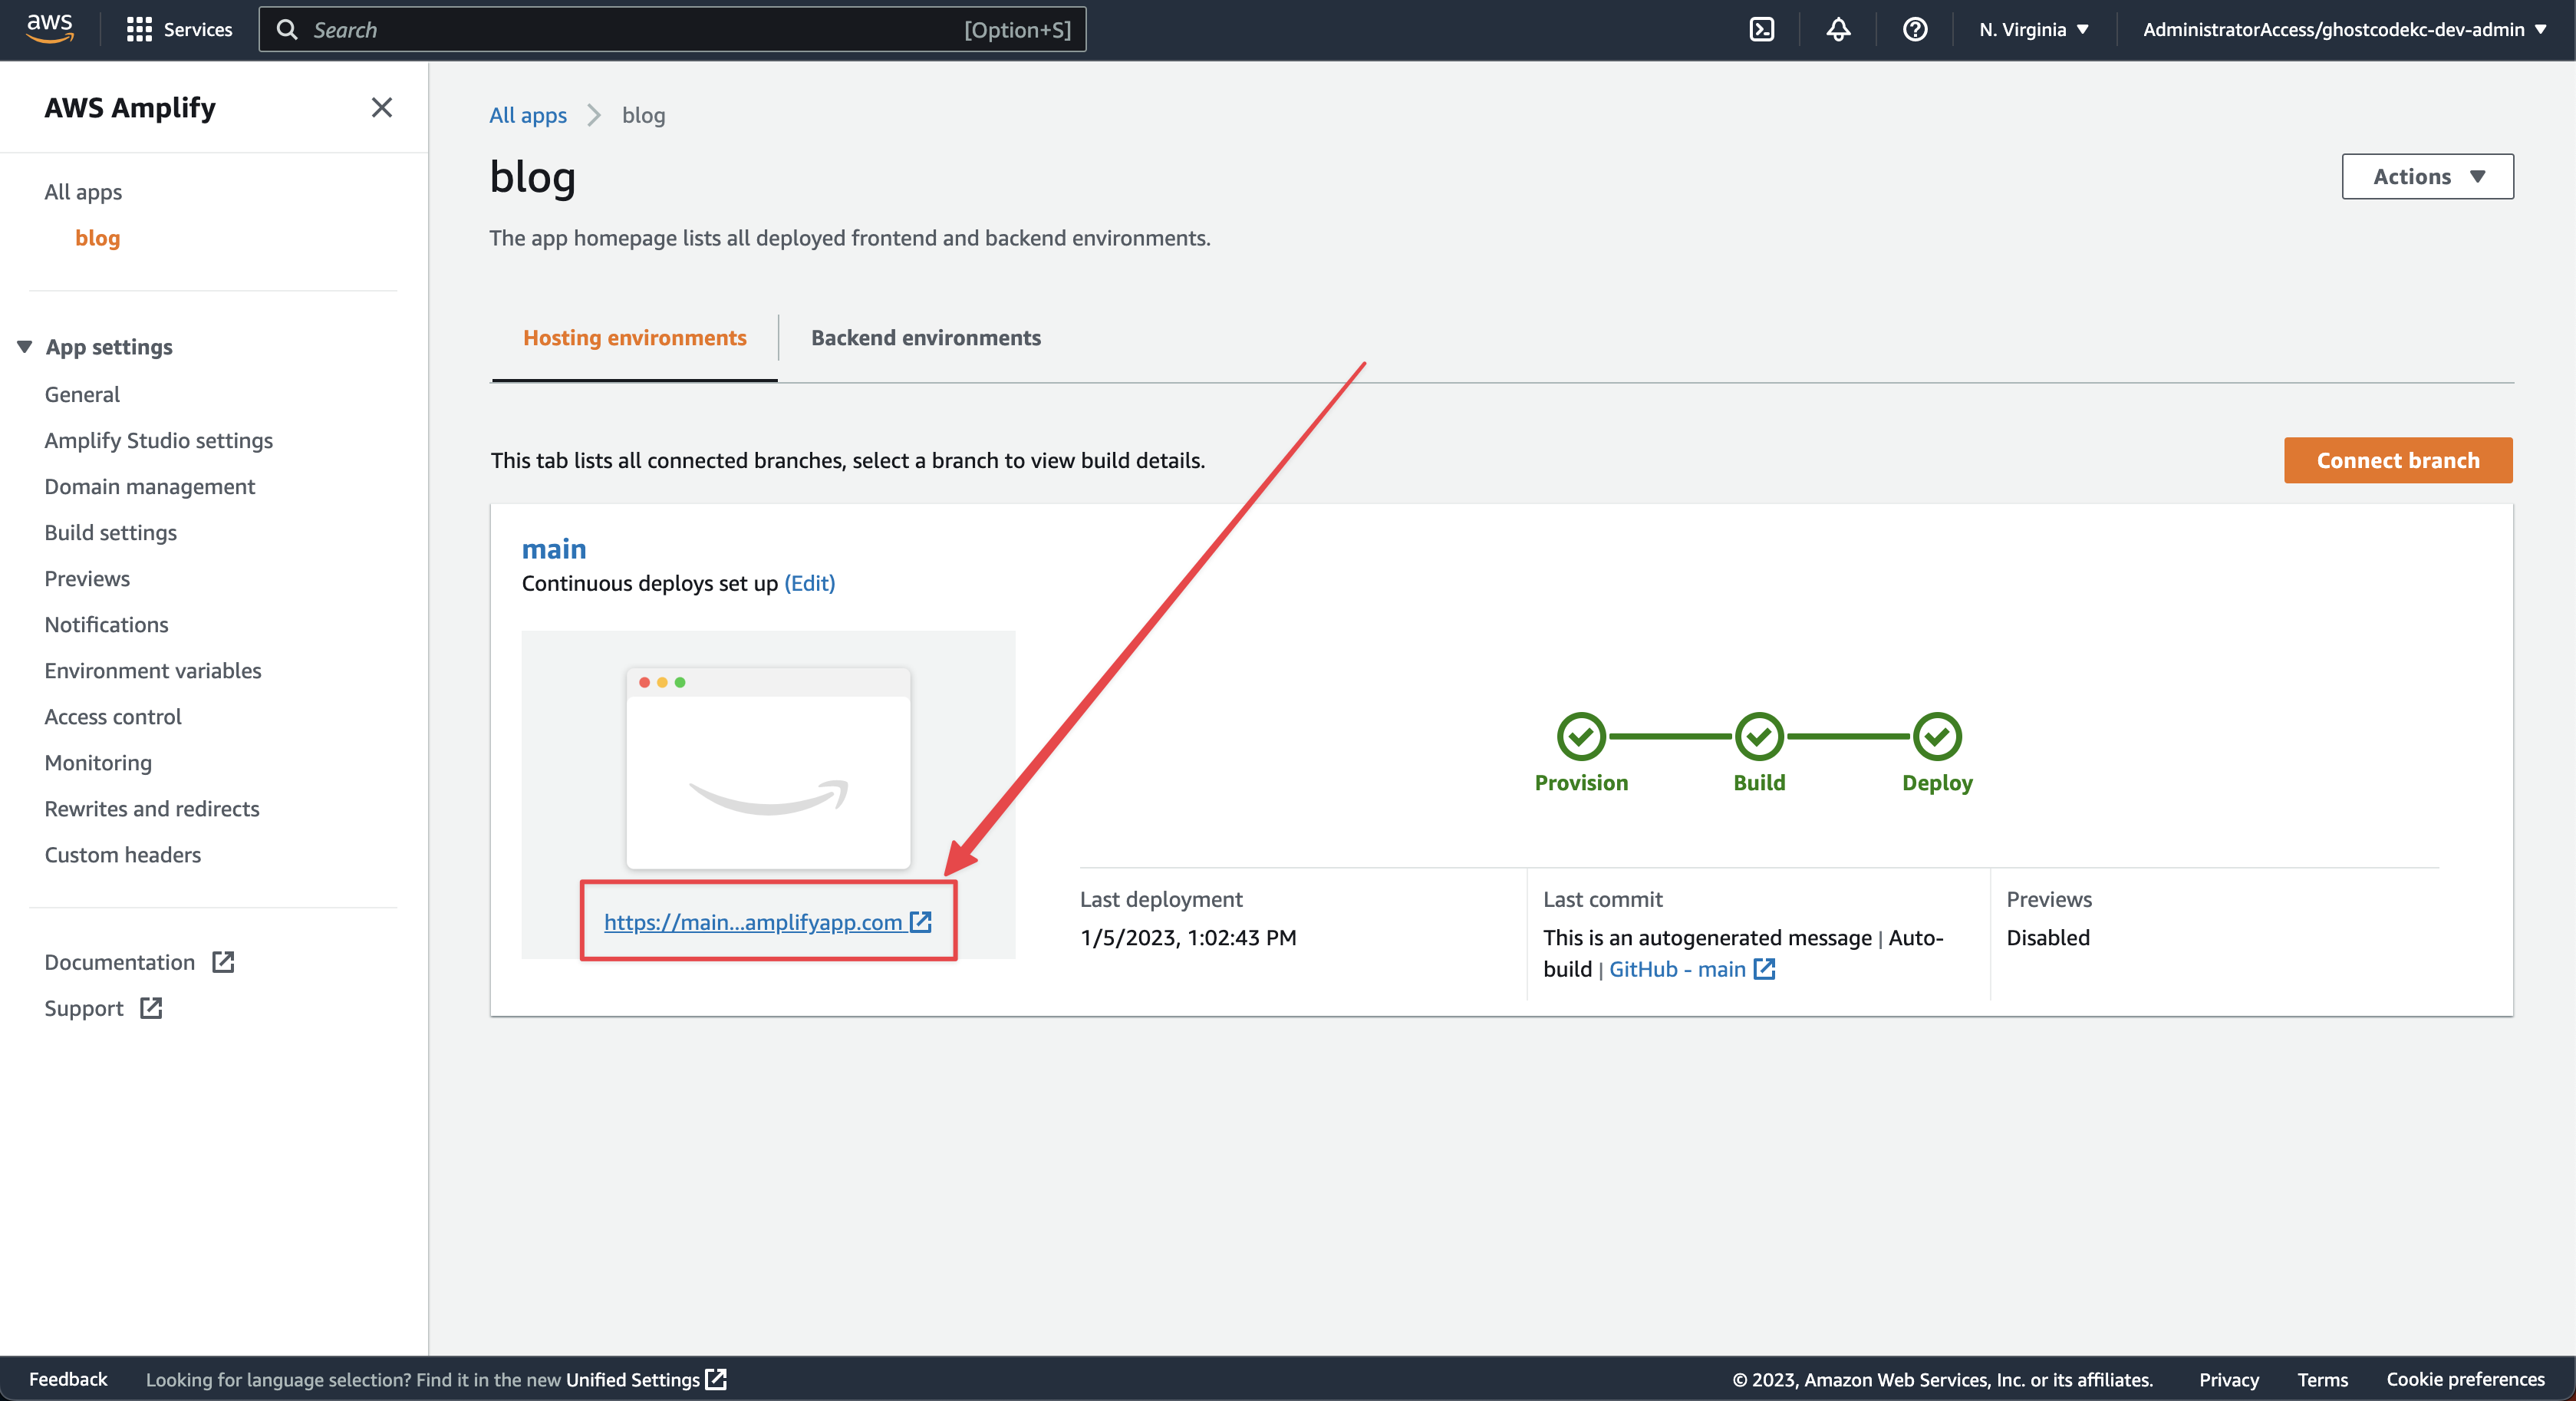
From now on every time you push a commit up to your GitHub repository it will automatically deploy the new version to this url!
(Optional) Configure Your Custom Domain
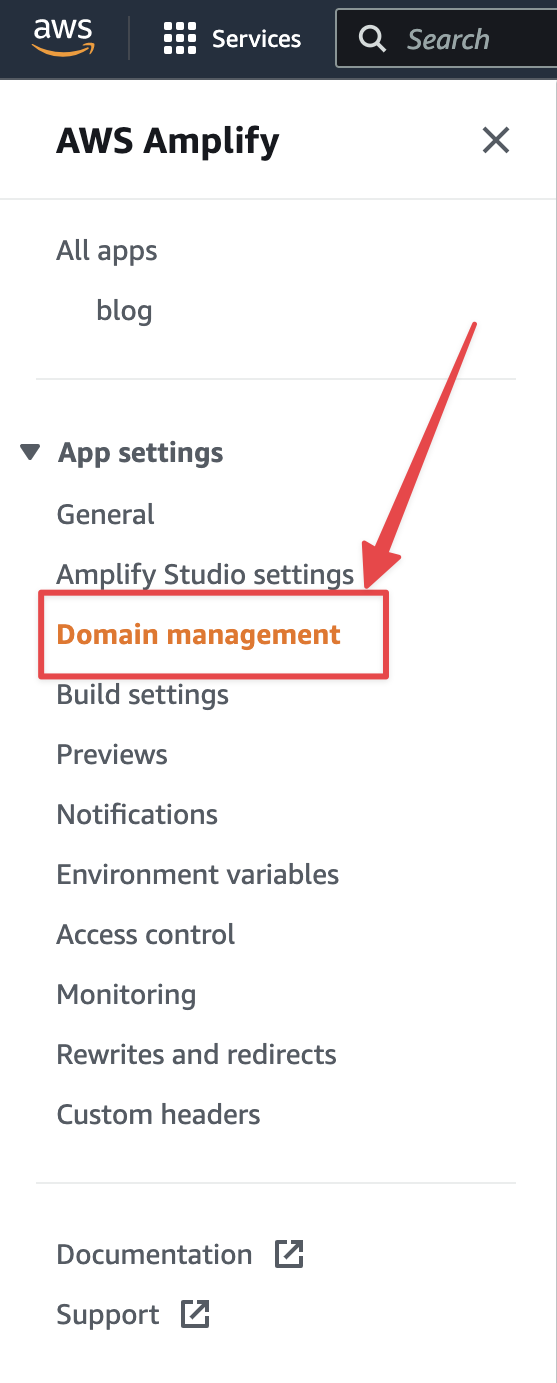
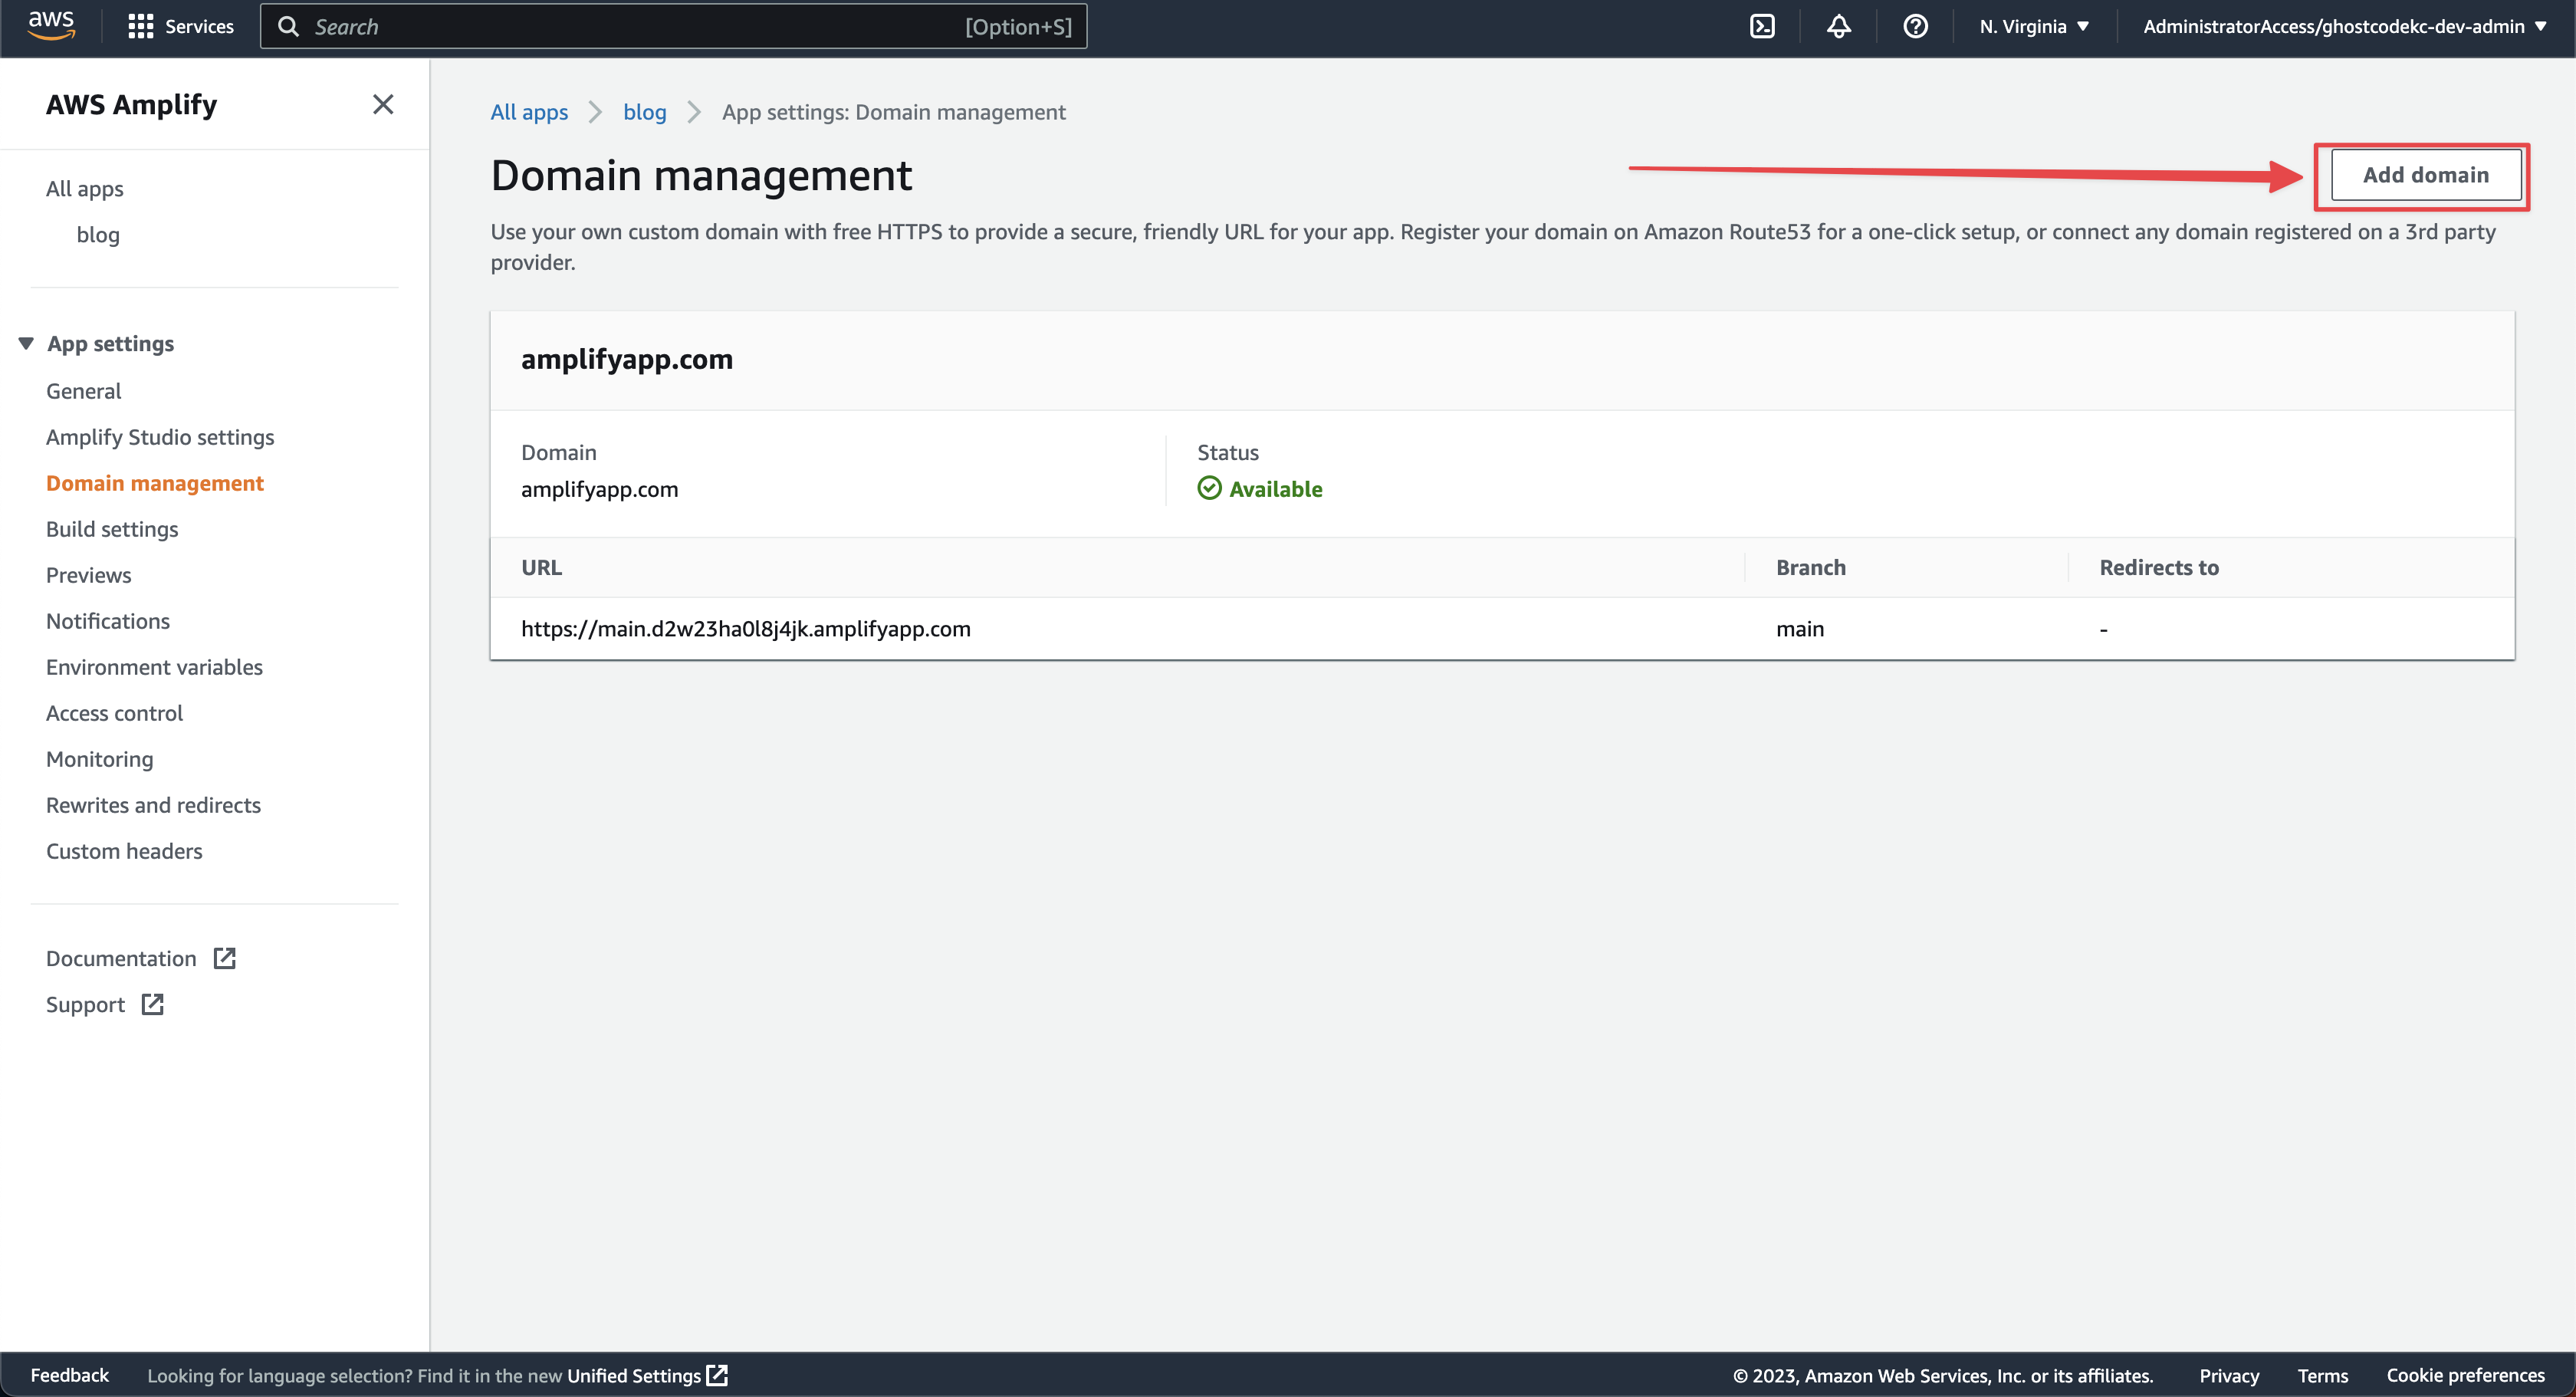
If you already have your own domain registered with AWS in Route 53 it’s simple to point it (or a subdomain) to your new blog! To start the process you’re going to have to look on the left hand side of your Amplify project and click on “Domain management”.
When the Domain management page loads you’ll need to click on “Add domain”.
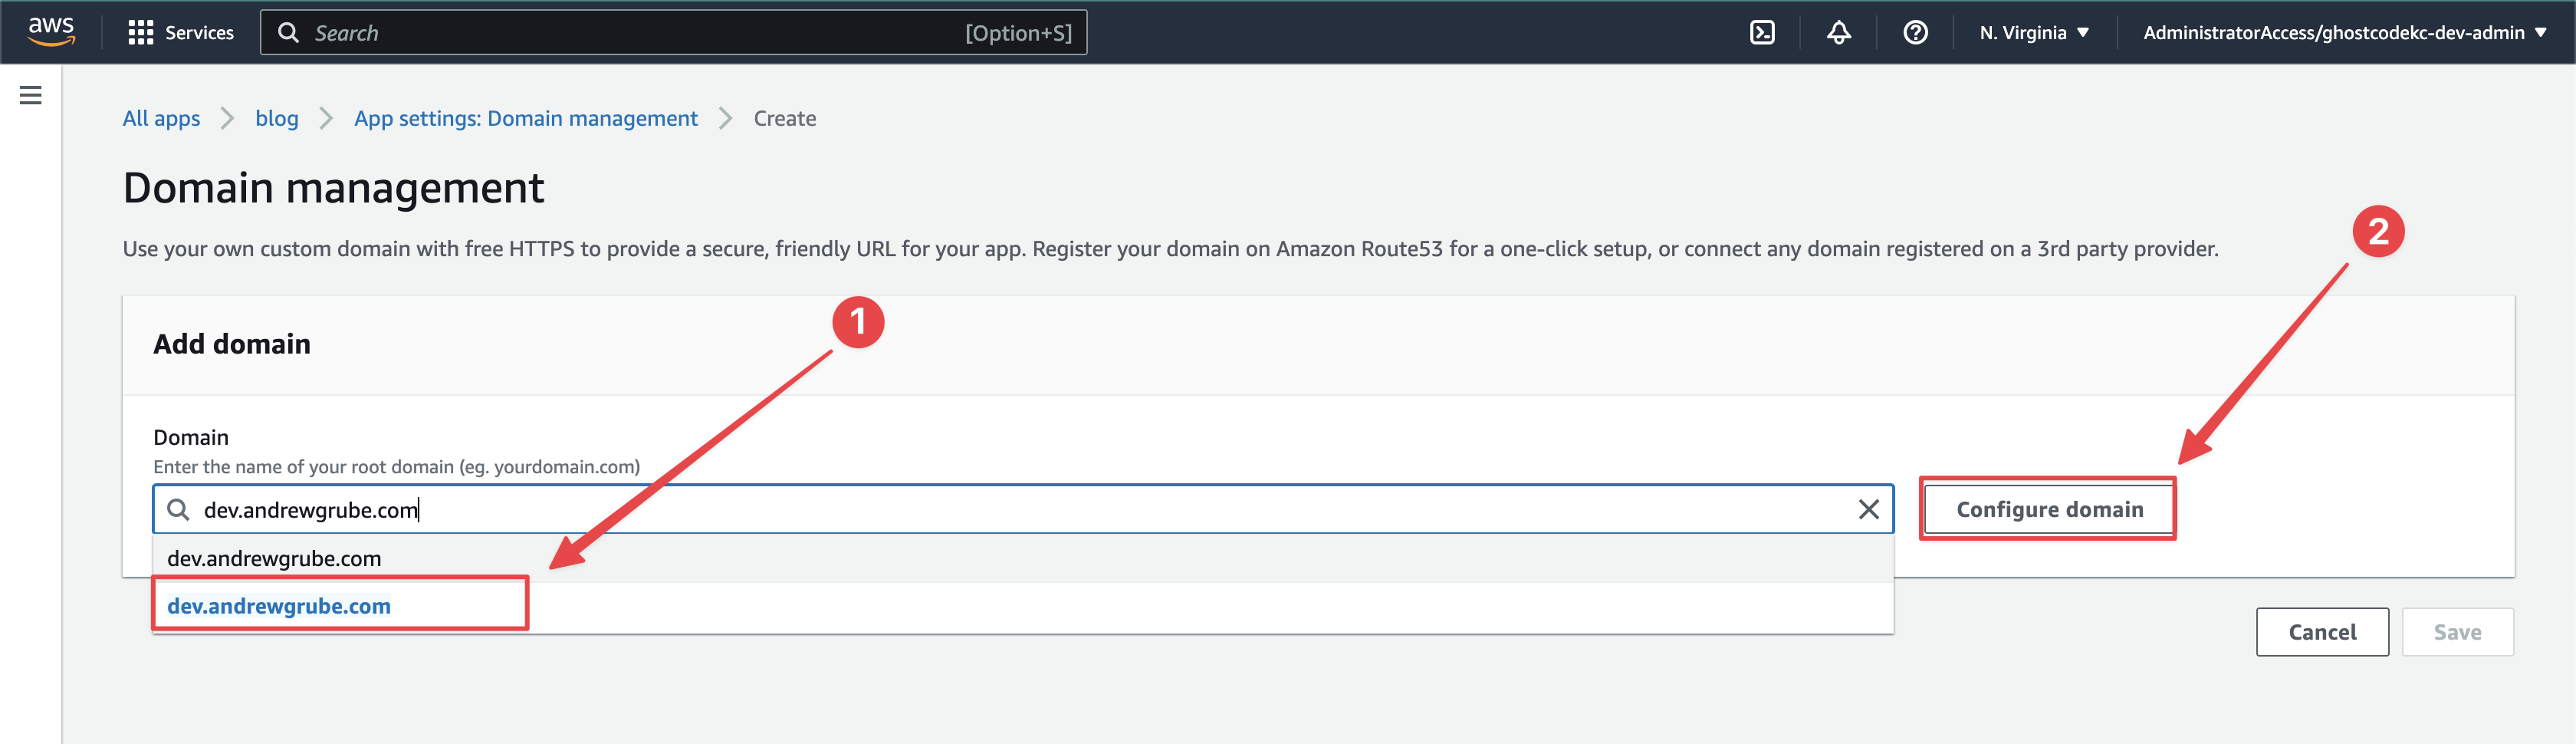
Next, select the dropdown which loads the available hosted zones from Route 53 and select the one you want to use. Once you have your selection made click on “Configure domain.”
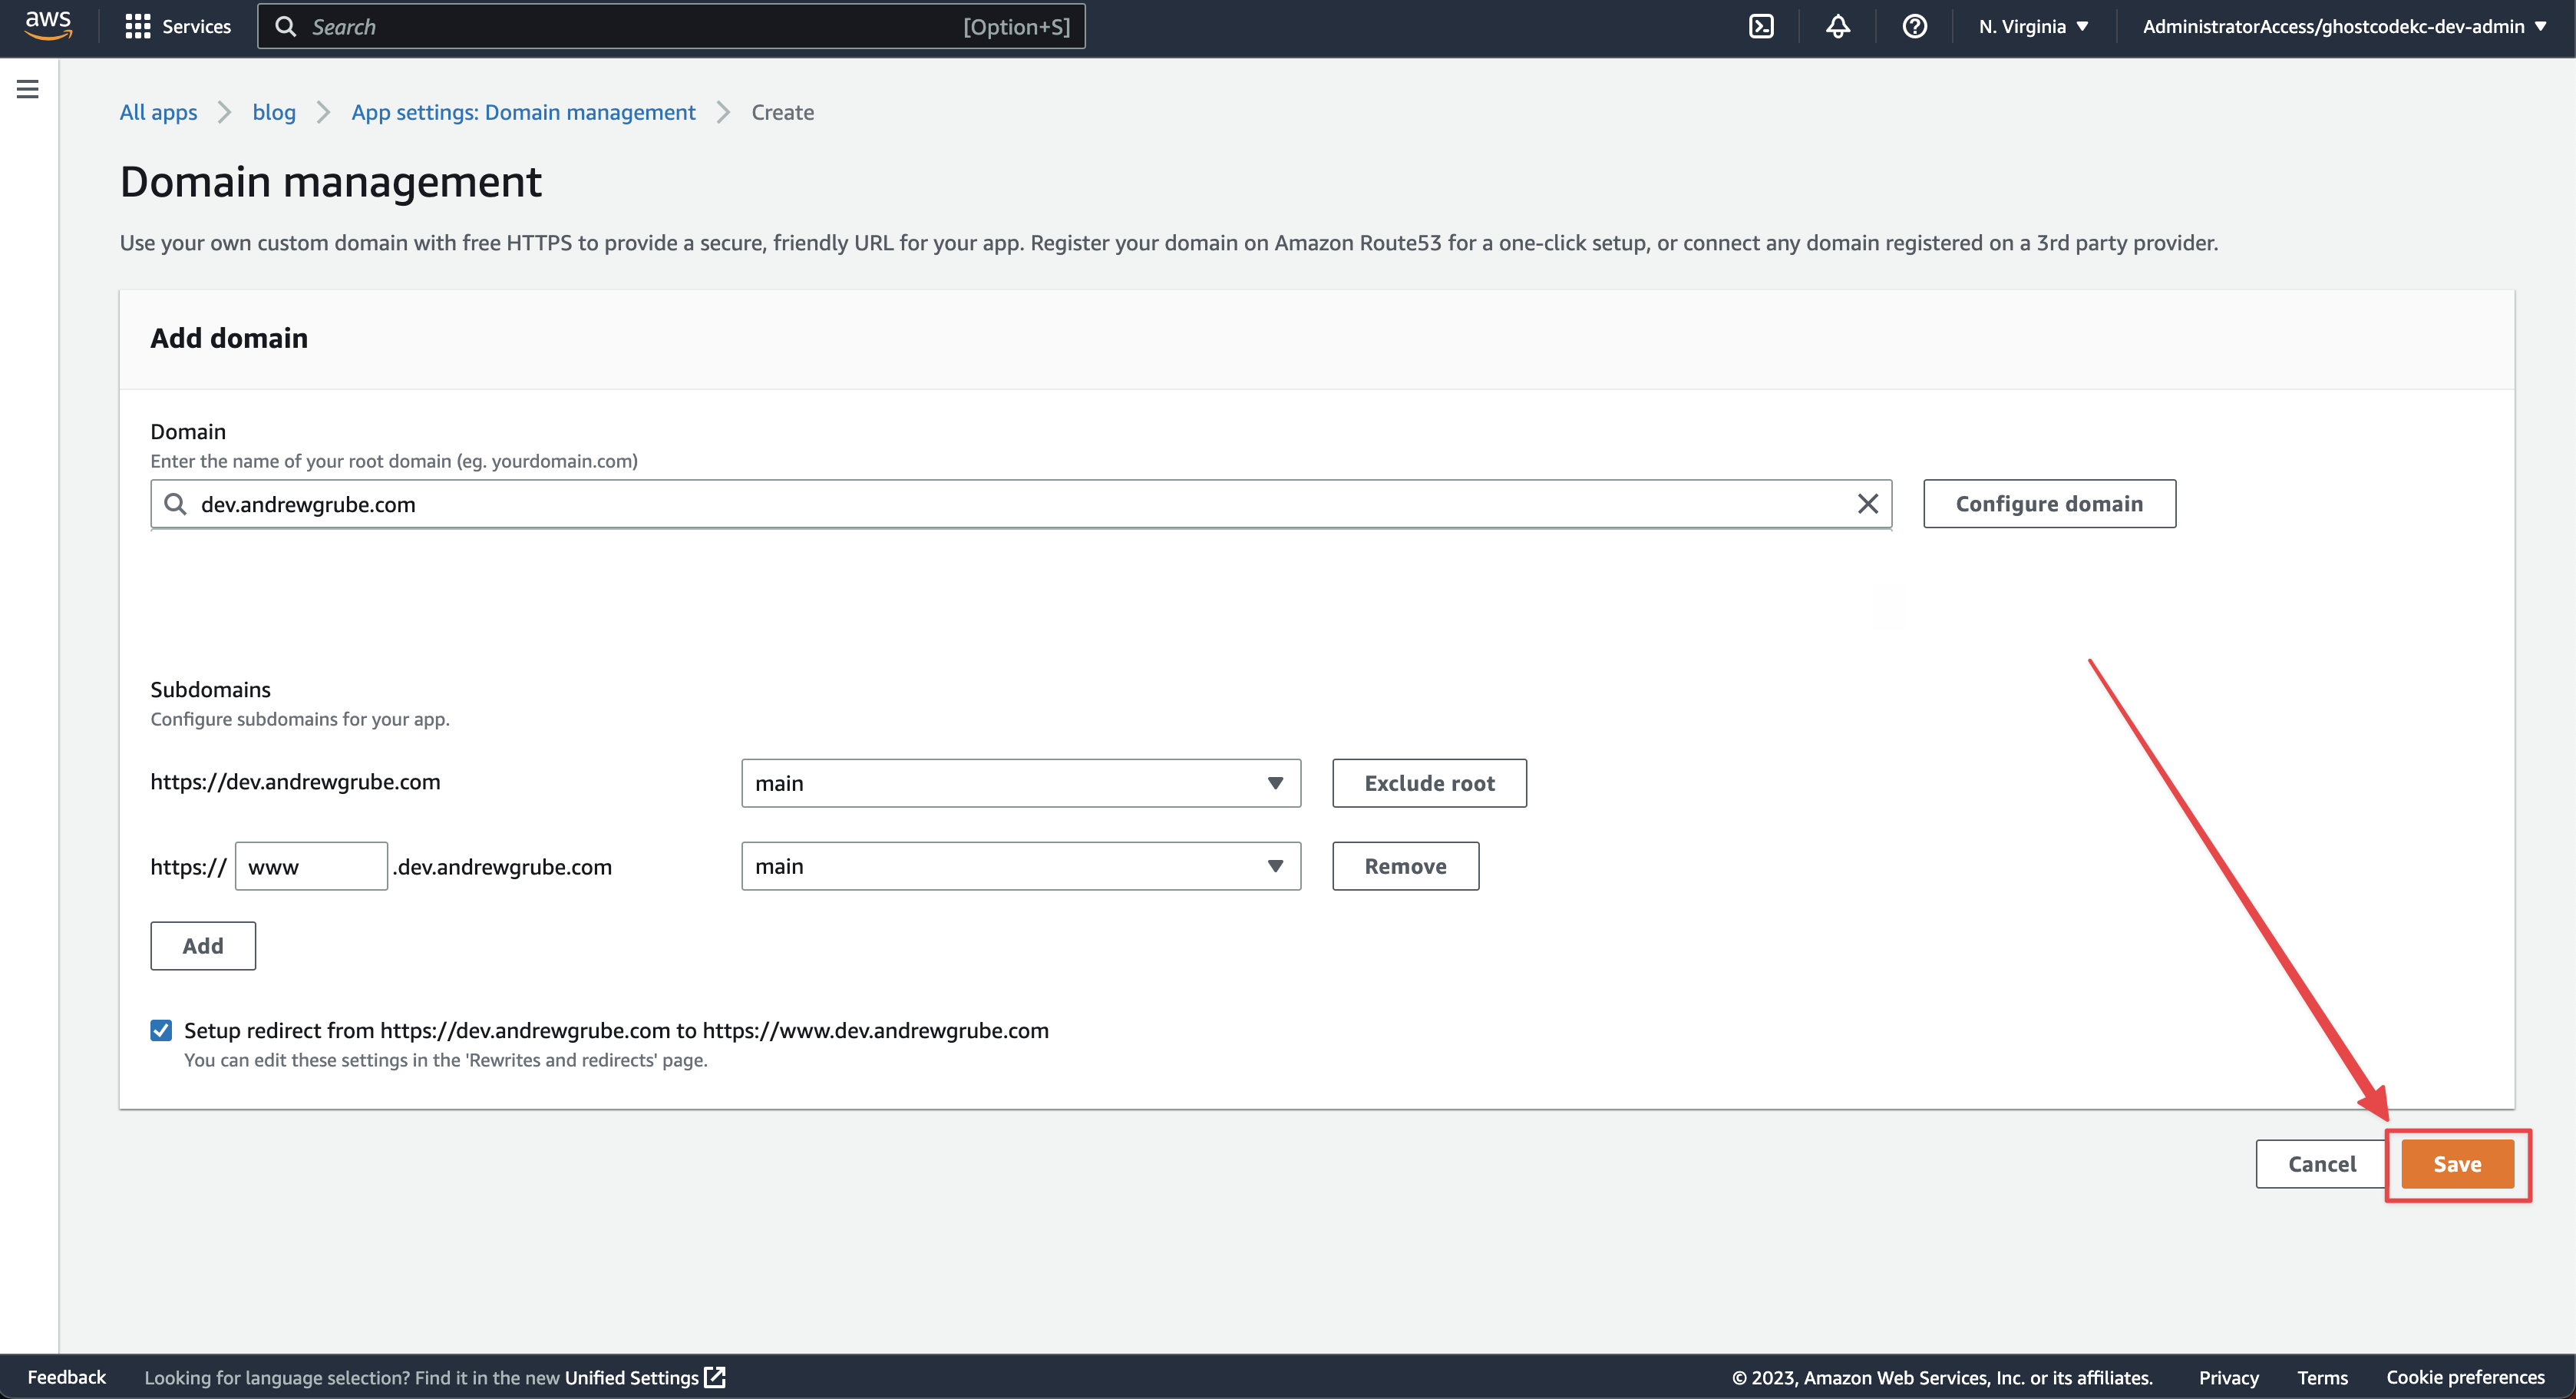
You shouldn’t have to change any options. See the screenshot below for what options were populated by default. Once you have your selections made click “Save”.
You will then be brought back to the Domain management page. This process will take about 10-15 minutes. It’s creating a CloudFront distribution and modifying your hosted zone to include your selections made on the previous page. If you’d like to follow along then
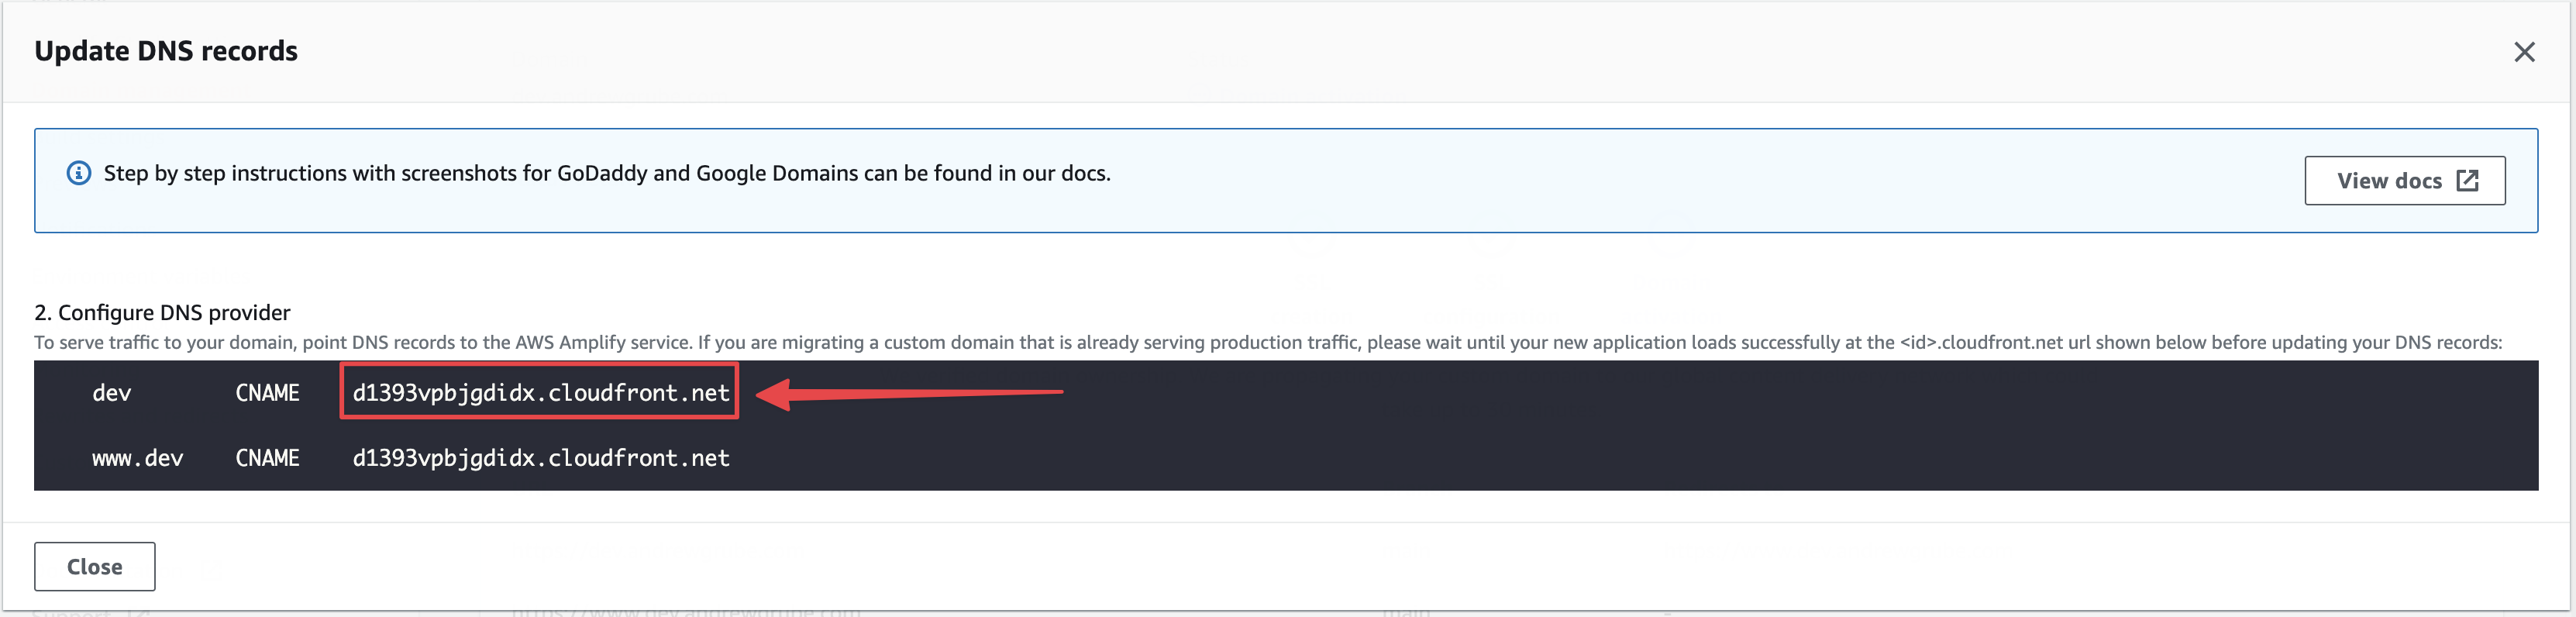
If you’d like to see what records are being added then click on Actions > View DNS Records.
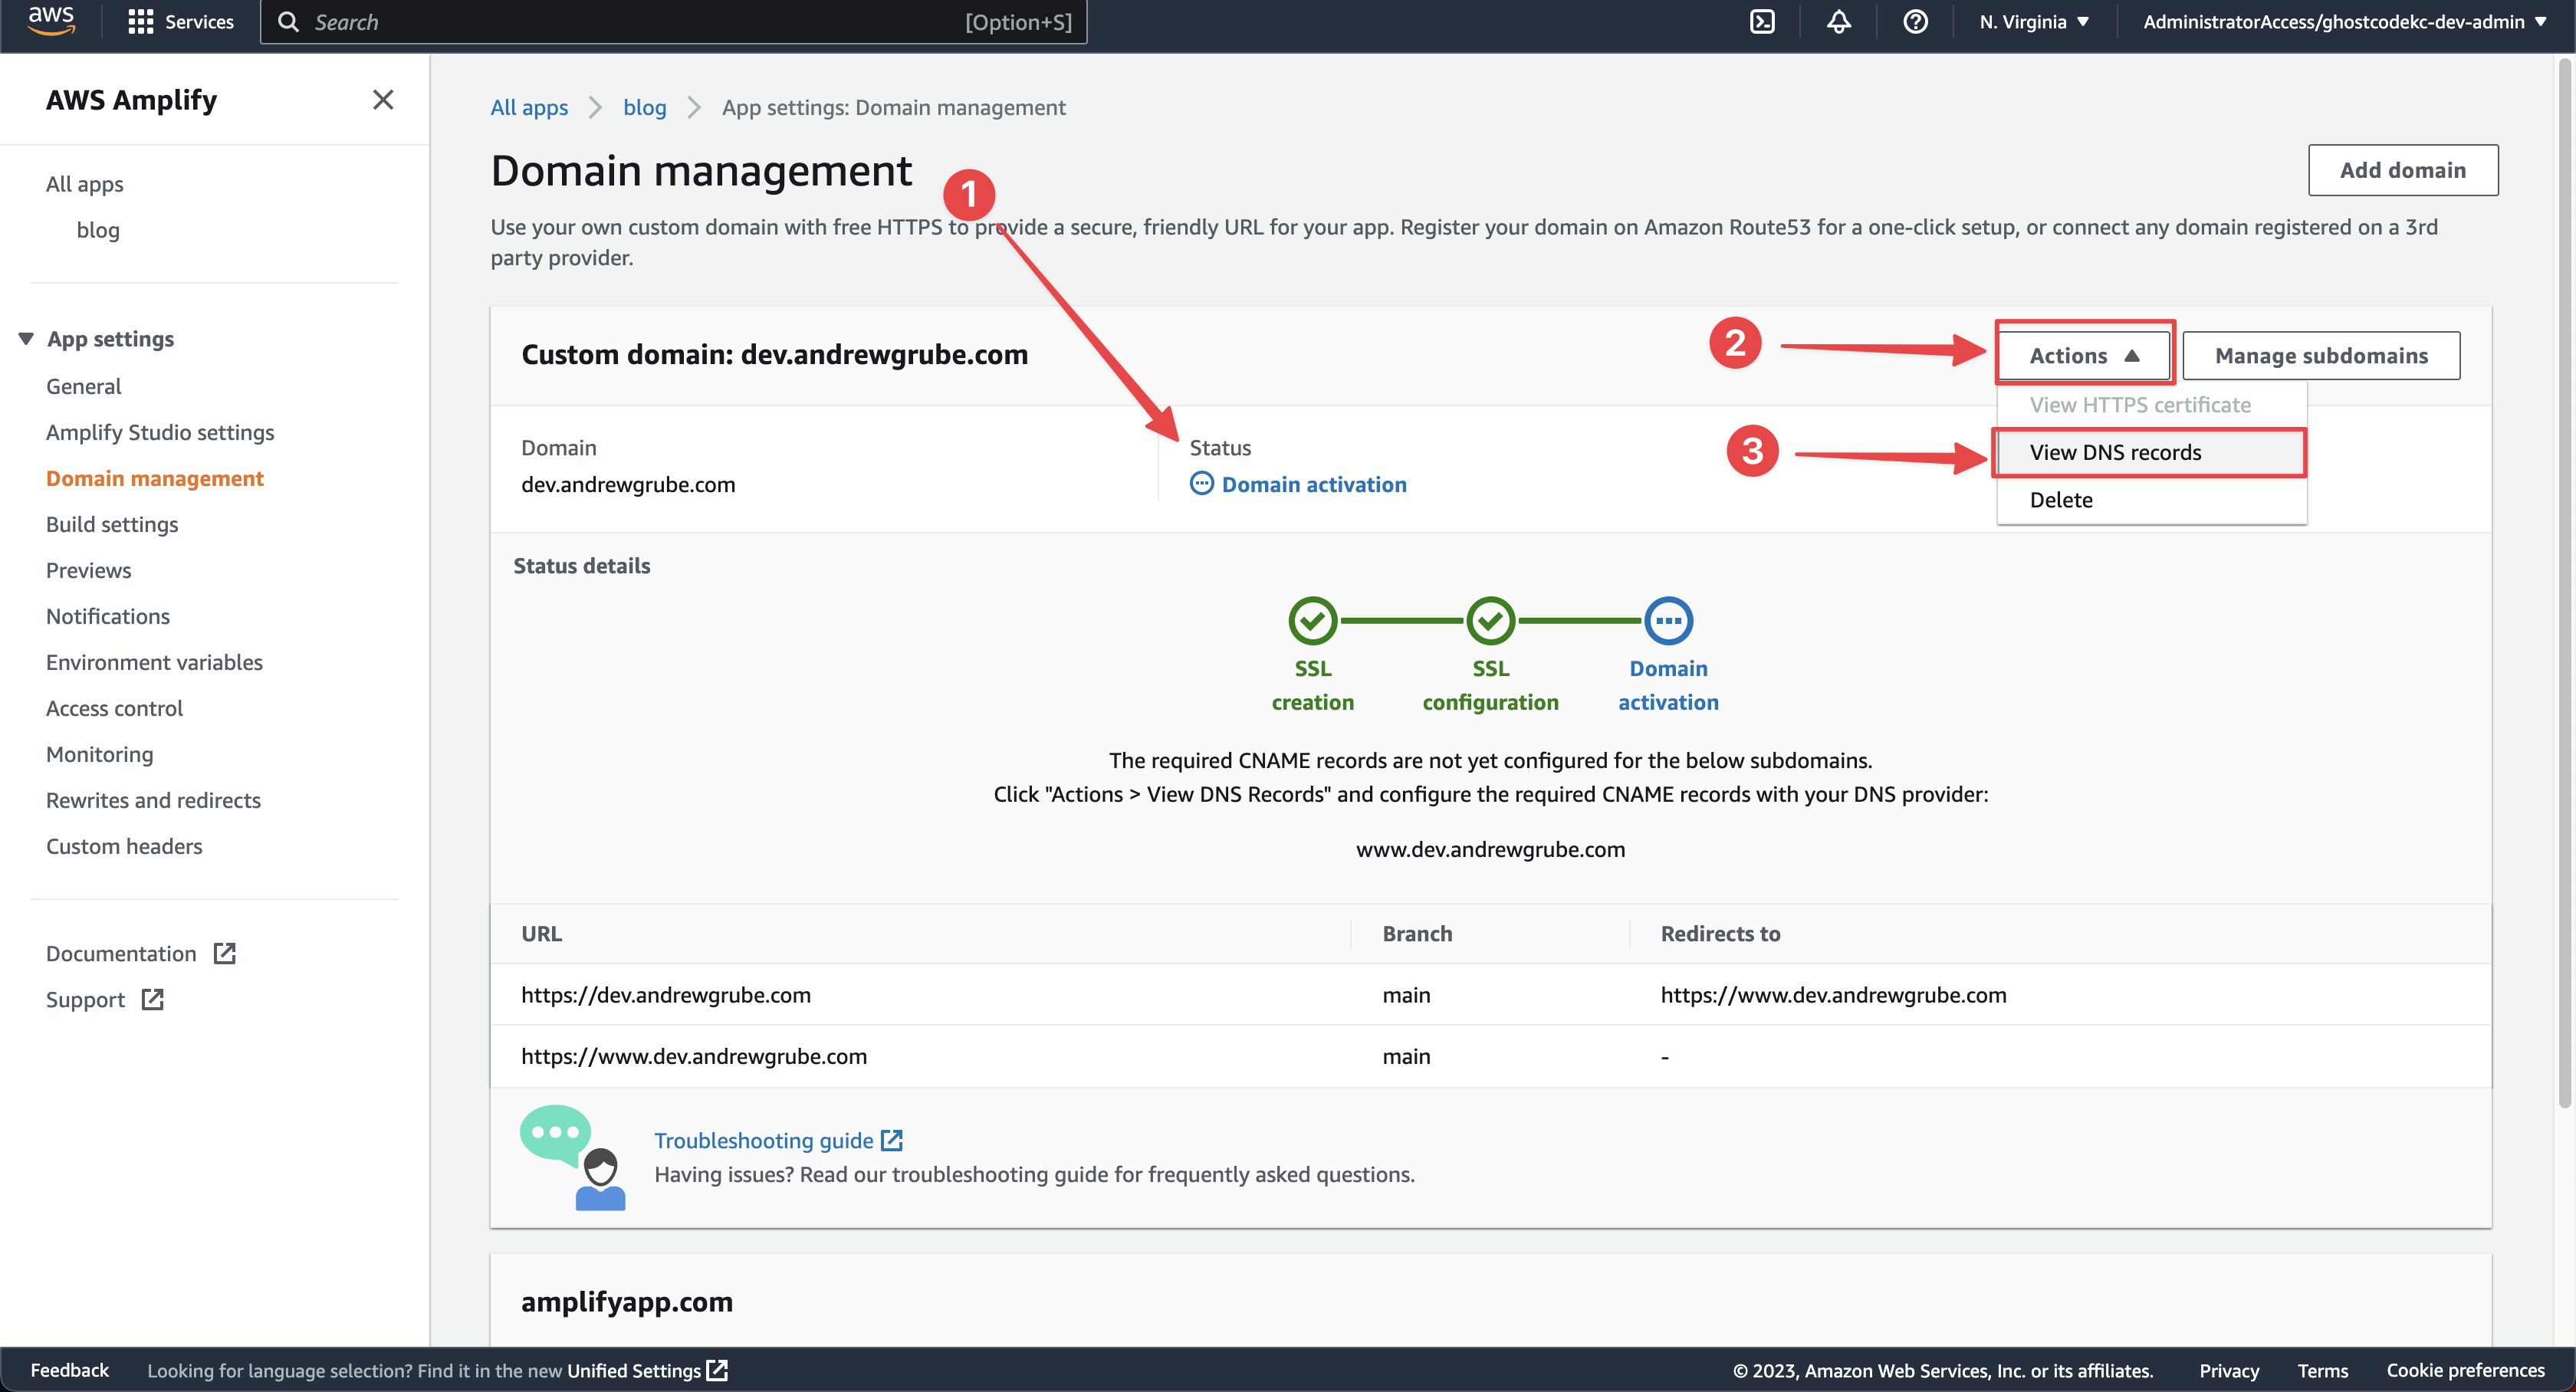
This page will show you the CloudFront distribution URL that will be served when you hit each of the records (www and the root dns record).
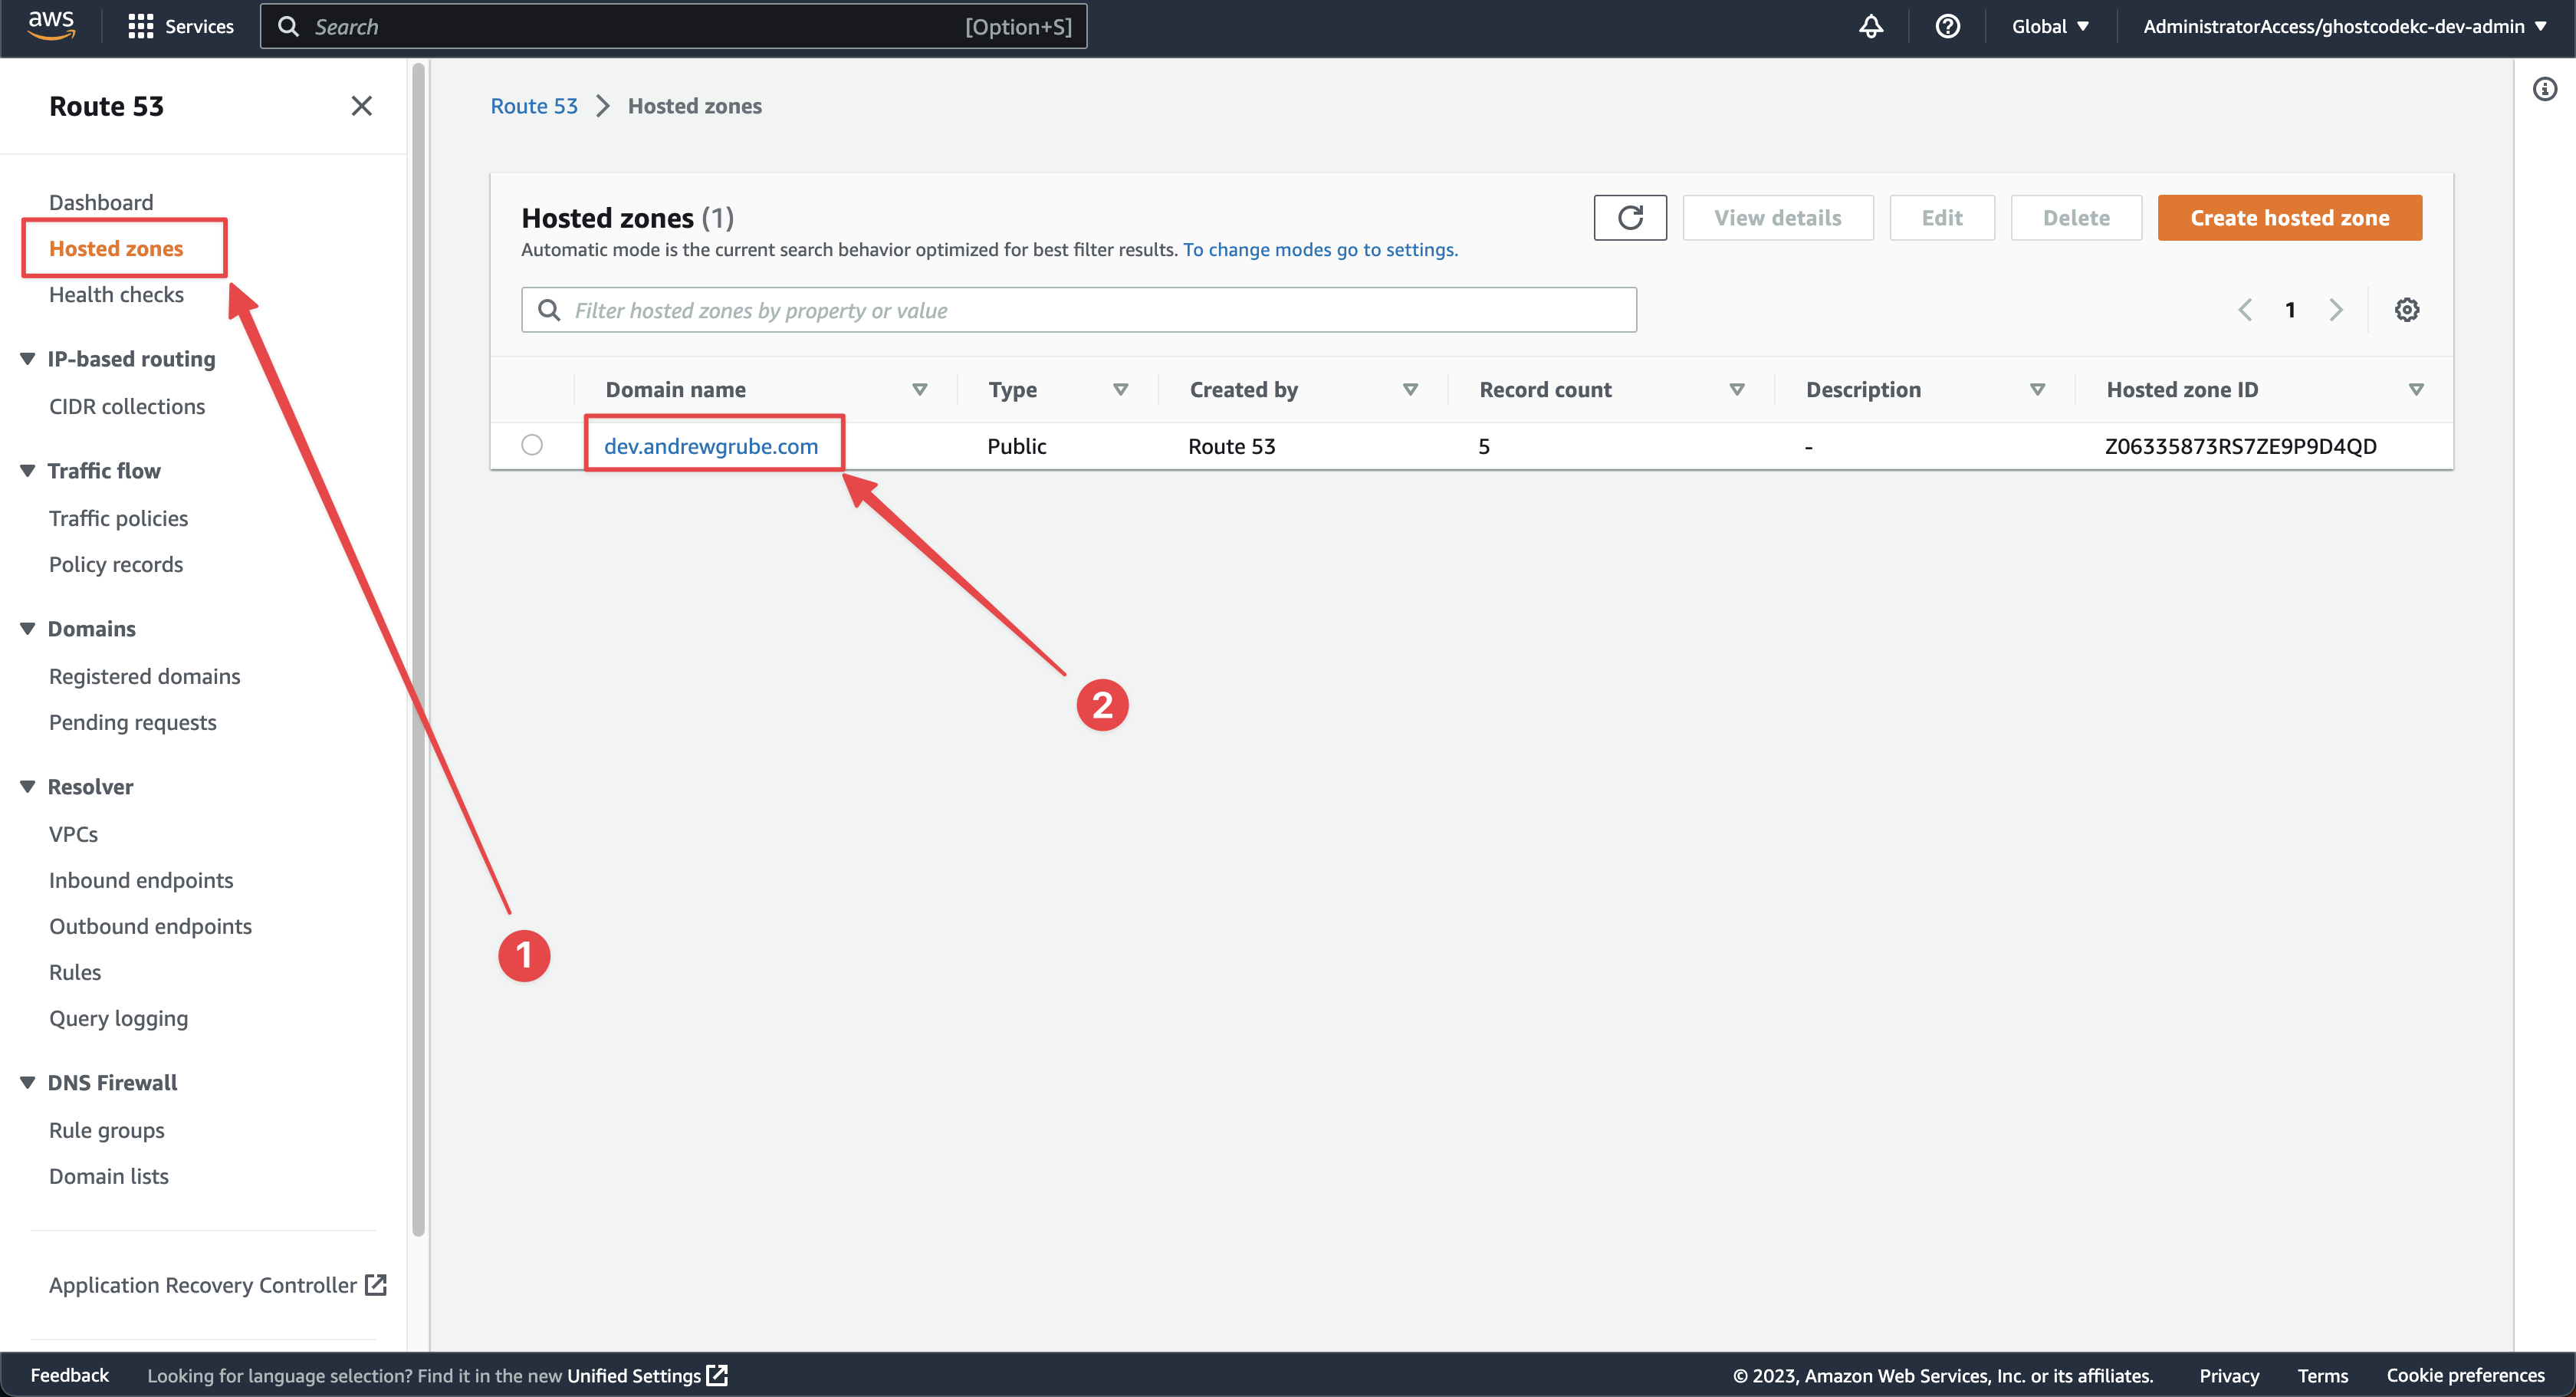
Navigate to Route 53 > Hosted Zones > [your domain] to view the DNS records within.
Verify that the correct Cloudfront URL from the previous step is in the value field for the 2 records created by AWS Amplify. This should be done automatically for you.
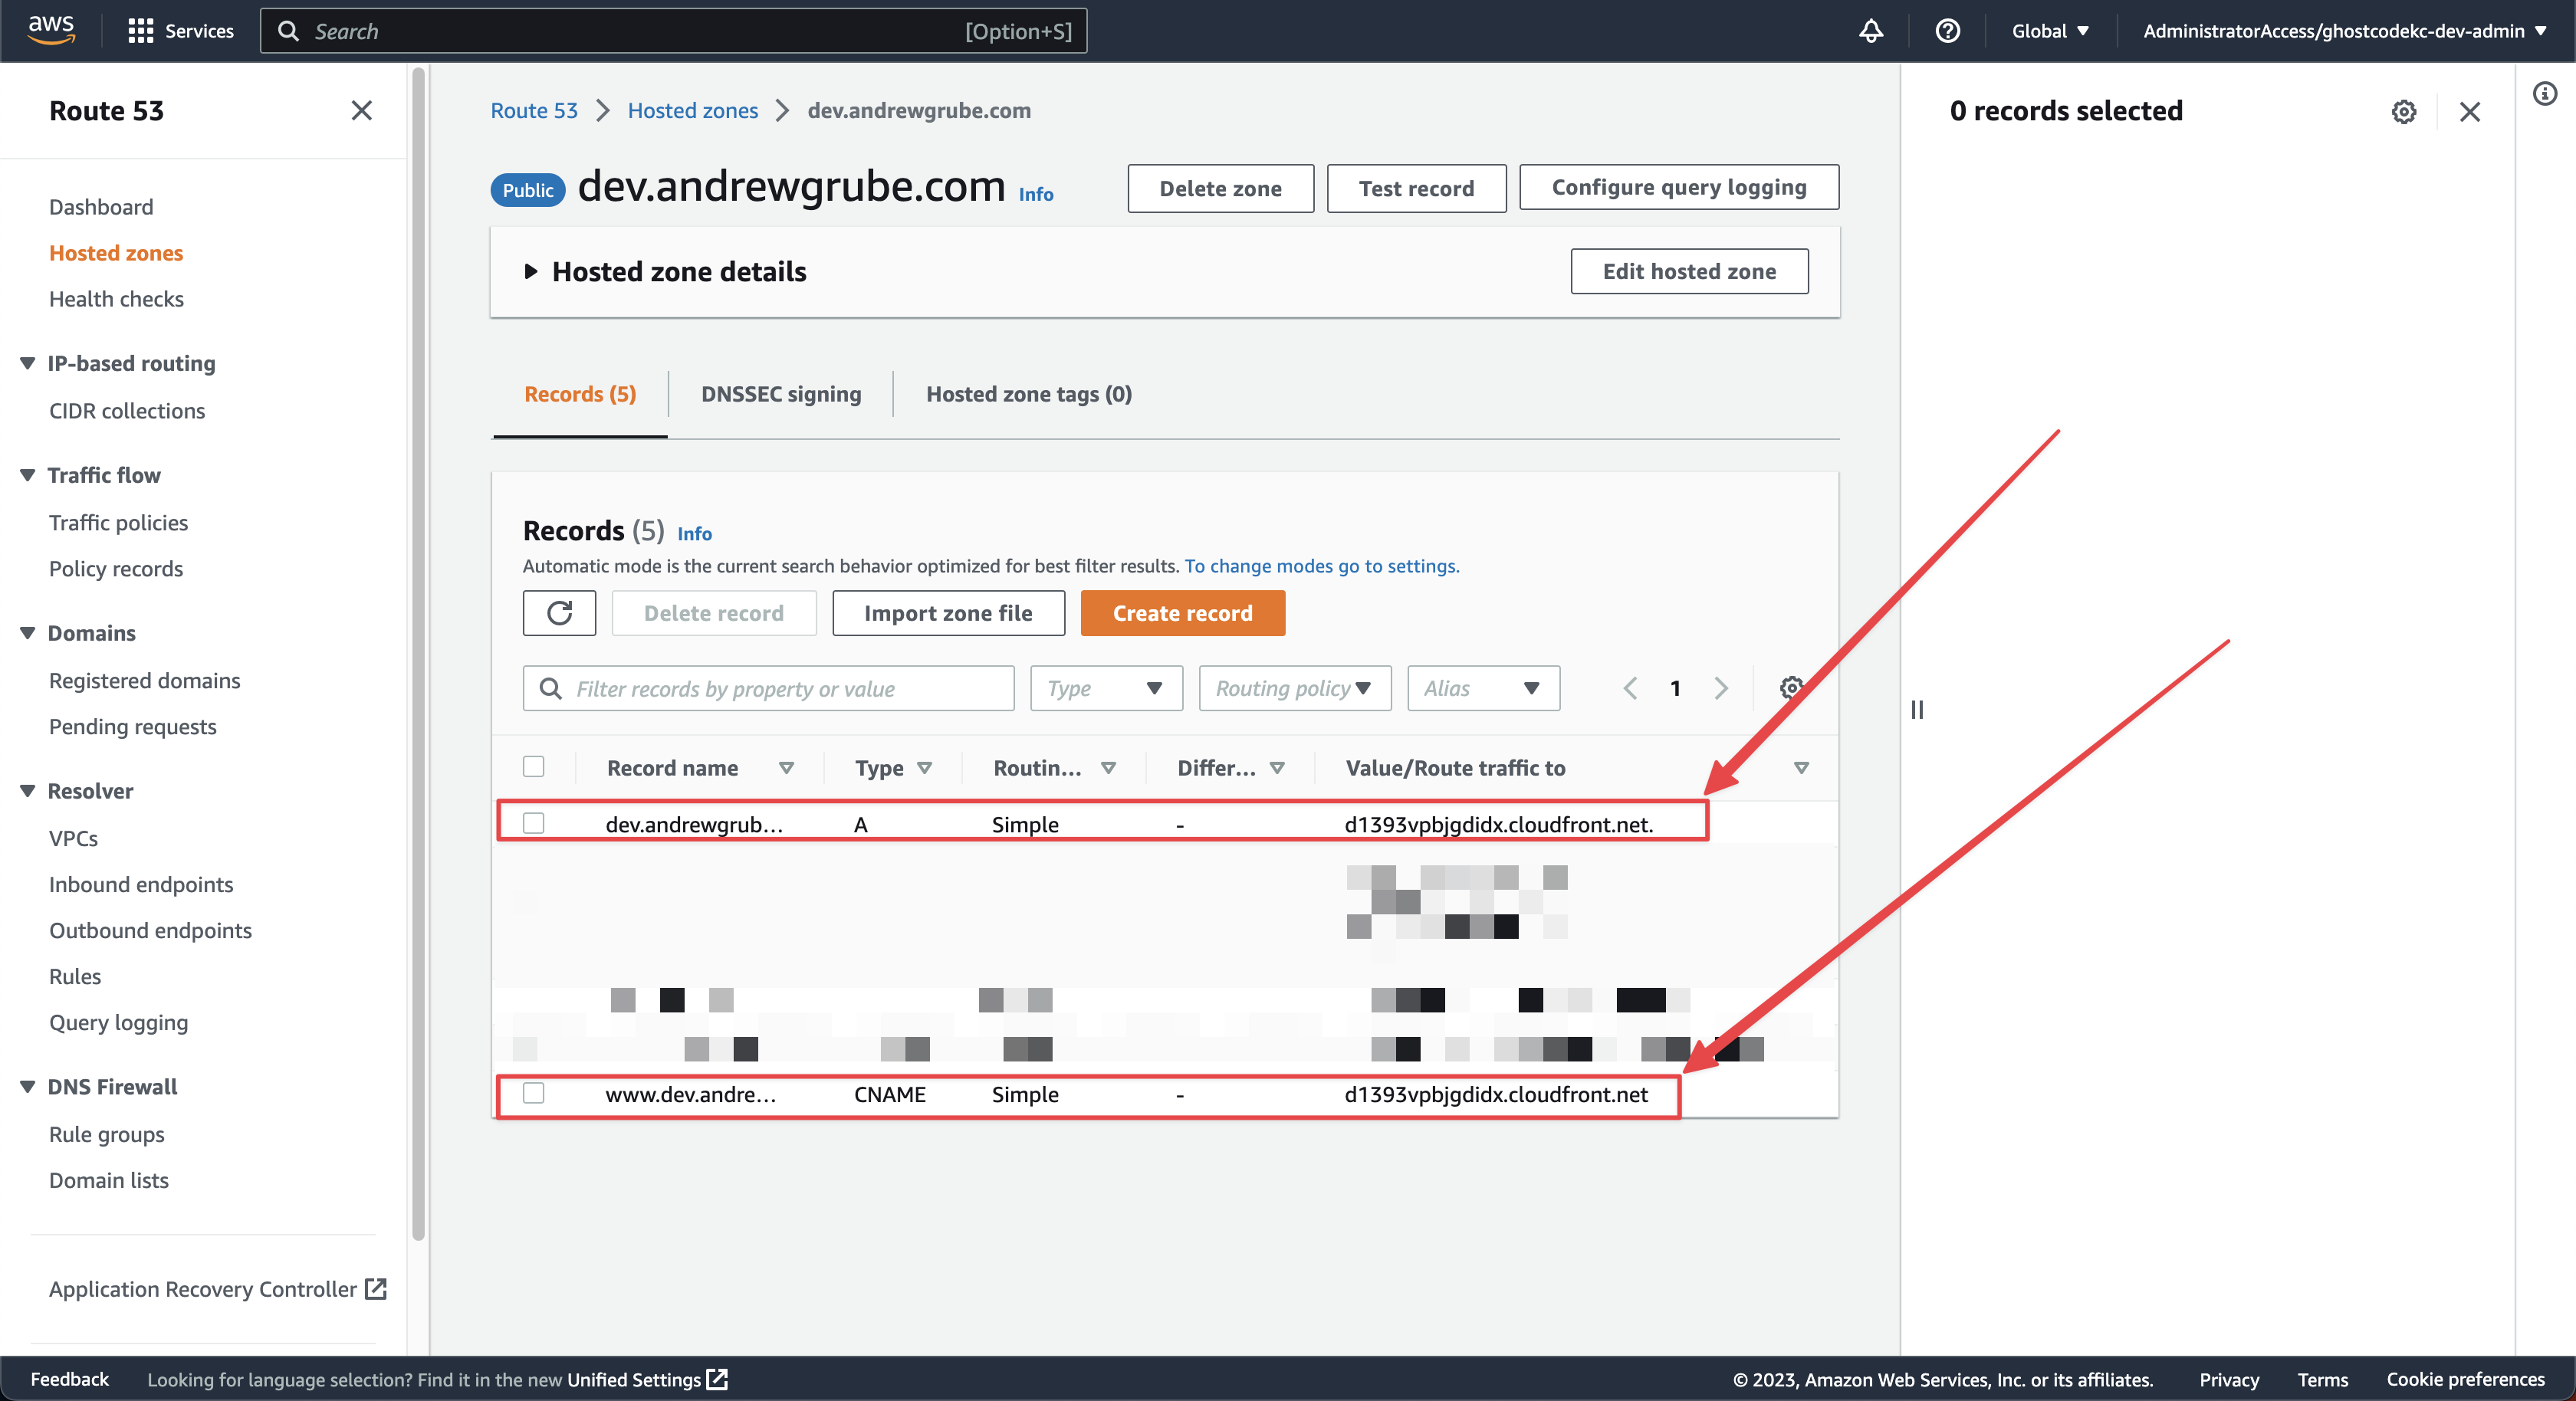
After the DNS records have populated you should be able to visit your domain to see your new blog!
